<?xml version="1.0"?>
<News hasArchived="true" page="8178" pageCount="10840" pageSize="10" timestamp="Wed, 30 Sep 2026 08:47:09 -0400" url="https://my3.my.umbc.edu/posts.xml?mode=activity&amp;page=8178&amp;range=2">
<NewsItem contentIssues="false" id="38222" important="false" status="posted" url="https://my3.my.umbc.edu/posts/38222">
<Title>Fabrication Internship at Applied Physics Lab</Title>
<Body>
<![CDATA[
    <div class="html-content">The intern will provide hands-on and innovative support in fabrication, assembly and delivery of high-quality parts and prototypes, produced primarily using composites fabrication, polymer molding, and additive manufacturing (3D printing) processes.<br><br>Duties:<br>-Hands-on support for fabrication of parts and prototypes with guidance from experienced fabrication staff members<br>-Lead small development projects related to fabrication technologies, such as 3D printing, with guidance from experienced staff members<br>-Provide hands-on support in maintaining lab facilities, improving organization, and helping cleanup completed projects<br>Qualifications - <br><br>Academic Discipline Desired:<br>Materials Engineering, Mechanical Engineering, Manufacturing Engineering or related technology areas<br><br>Required Skills:<br>Must be at least 18 years of age.  Interest in hands-on prototype fabrication, including fiber-reinforced polymer composites, polymer casting and molding, adhesive bonding, and 3D printing processes. Willingness to learn and research fabrication technologies, such as 3D printing, combined with a good work ethic, the ability to multi-task, basic computer skills, and effective communication skills. Willingness to help with hands-on fabrication work and lab organization and cleanup.<br>Ability to work independently and willingness to proactively seek ways to help full-time staff. Attention to detail and work quality.<br><br>Desired Skills:<br>Experience in hands-on fabrication methods or laboratory environment. Experience with composites, structural bonding, polymer molding, or 3D printing.<br><br>To apply:<br>Submit a resume to Position ID 9261786 in UMBCworks.<br>
    </div>
]]>
</Body>
<Summary>The intern will provide hands-on and innovative support in fabrication, assembly and delivery of high-quality parts and prototypes, produced primarily using composites fabrication, polymer...</Summary>
<TrackingUrl>https://my3.my.umbc.edu/api/v0/pixel/news/38222/guest@my.umbc.edu/d567cfa08f3e451e54a7c7ae6441b12c/api/pixel</TrackingUrl>
<Group token="careers">Career Center</Group>
<GroupUrl>https://my3.my.umbc.edu/groups/careers</GroupUrl>
<AvatarUrl>https://assets2-my.umbc.edu/system/shared/avatars/groups/000/000/018/729f2c7eeeab66f50f4ab3677539a585/xsmall.png?1411655278</AvatarUrl>
<AvatarUrl size="original">https://assets4-my.umbc.edu/system/shared/avatars/groups/000/000/018/729f2c7eeeab66f50f4ab3677539a585/original.jpg?1411655278</AvatarUrl>
<AvatarUrl size="xxlarge">https://assets2-my.umbc.edu/system/shared/avatars/groups/000/000/018/729f2c7eeeab66f50f4ab3677539a585/xxlarge.png?1411655278</AvatarUrl>
<AvatarUrl size="xlarge">https://assets1-my.umbc.edu/system/shared/avatars/groups/000/000/018/729f2c7eeeab66f50f4ab3677539a585/xlarge.png?1411655278</AvatarUrl>
<AvatarUrl size="large">https://assets2-my.umbc.edu/system/shared/avatars/groups/000/000/018/729f2c7eeeab66f50f4ab3677539a585/large.png?1411655278</AvatarUrl>
<AvatarUrl size="medium">https://assets3-my.umbc.edu/system/shared/avatars/groups/000/000/018/729f2c7eeeab66f50f4ab3677539a585/medium.png?1411655278</AvatarUrl>
<AvatarUrl size="small">https://assets3-my.umbc.edu/system/shared/avatars/groups/000/000/018/729f2c7eeeab66f50f4ab3677539a585/small.png?1411655278</AvatarUrl>
<AvatarUrl size="xsmall">https://assets2-my.umbc.edu/system/shared/avatars/groups/000/000/018/729f2c7eeeab66f50f4ab3677539a585/xsmall.png?1411655278</AvatarUrl>
<AvatarUrl size="xxsmall">https://assets2-my.umbc.edu/system/shared/avatars/groups/000/000/018/729f2c7eeeab66f50f4ab3677539a585/xxsmall.png?1411655278</AvatarUrl>
<Sponsor>Career Services Center</Sponsor>
<PawCount>3</PawCount>
<CommentCount>0</CommentCount>
<CommentsAllowed>true</CommentsAllowed>
<PostedAt>Mon, 11 Nov 2013 14:01:28 -0500</PostedAt>
</NewsItem>

<NewsItem contentIssues="false" id="122974" important="false" status="posted" url="https://my3.my.umbc.edu/posts/122974">
<Title>Faculty and Alumni of Umbilicus Perform at The Parlor</Title>
<Body>
<![CDATA[
    <div class="html-content">
    <p>The percussion quartet <a href="http://www.youtube.com/watch?v=y9ZpqZQ5raU" rel="nofollow external" class="bo">Umbilicus</a>, featuring Tom Goldstein, music, Shelly Purdy ’10, Will Redman ’98, and Rob Wolk ’11, performs Friday, November 15 at 8 p.m. at The Parlor, in a program including a set with new Department of Music faculty member, Patrick Crossland, trombone. Umbilicus’ set will include work by Anna Rubin, music.</p>
    <p>The Parlor<br>
    800 St. Paul Street<br>
    Baltimore, MD</p>
    <p>Umbilicus was founded in 2012 in reaction to the generic contemporary percussion quartet, with the intention of promoting and performing a more experimental repertoire, much if it composed by its members.</p>
    <p>The suggested donation for this event is $5-$7.</p>
    </div>
]]>
</Body>
<Summary>The percussion quartet Umbilicus, featuring Tom Goldstein, music, Shelly Purdy ’10, Will Redman ’98, and Rob Wolk ’11, performs Friday, November 15 at 8 p.m. at The Parlor, in a program including...</Summary>
<Website>https://umbc.edu/stories/faculty-and-alumni-of-umbilicus-perform-at-the-parlor/</Website>
<TrackingUrl>https://my3.my.umbc.edu/api/v0/pixel/news/122974/guest@my.umbc.edu/d75cb706c9bd2424cd0b32349b7ef292/api/pixel</TrackingUrl>
<Tag>arts-and-culture</Tag>
<Tag>cahss</Tag>
<Tag>engage</Tag>
<Tag>music</Tag>
<Tag>visualarts</Tag>
<Group token="umbc-news-magazine">UMBC News &amp;amp; Magazine</Group>
<GroupUrl>https://my3.my.umbc.edu/groups/umbc-news-magazine</GroupUrl>
<AvatarUrl>https://assets1-my.umbc.edu/system/shared/avatars/groups/000/001/943/24435aa6207c452e7bc15cc74b42c7bb/xsmall.png?1748556657</AvatarUrl>
<AvatarUrl size="original">https://assets1-my.umbc.edu/system/shared/avatars/groups/000/001/943/24435aa6207c452e7bc15cc74b42c7bb/original.png?1748556657</AvatarUrl>
<AvatarUrl size="xxlarge">https://assets2-my.umbc.edu/system/shared/avatars/groups/000/001/943/24435aa6207c452e7bc15cc74b42c7bb/xxlarge.png?1748556657</AvatarUrl>
<AvatarUrl size="xlarge">https://assets2-my.umbc.edu/system/shared/avatars/groups/000/001/943/24435aa6207c452e7bc15cc74b42c7bb/xlarge.png?1748556657</AvatarUrl>
<AvatarUrl size="large">https://assets3-my.umbc.edu/system/shared/avatars/groups/000/001/943/24435aa6207c452e7bc15cc74b42c7bb/large.png?1748556657</AvatarUrl>
<AvatarUrl size="medium">https://assets1-my.umbc.edu/system/shared/avatars/groups/000/001/943/24435aa6207c452e7bc15cc74b42c7bb/medium.png?1748556657</AvatarUrl>
<AvatarUrl size="small">https://assets2-my.umbc.edu/system/shared/avatars/groups/000/001/943/24435aa6207c452e7bc15cc74b42c7bb/small.png?1748556657</AvatarUrl>
<AvatarUrl size="xsmall">https://assets1-my.umbc.edu/system/shared/avatars/groups/000/001/943/24435aa6207c452e7bc15cc74b42c7bb/xsmall.png?1748556657</AvatarUrl>
<AvatarUrl size="xxsmall">https://assets2-my.umbc.edu/system/shared/avatars/groups/000/001/943/24435aa6207c452e7bc15cc74b42c7bb/xxsmall.png?1748556657</AvatarUrl>
<Sponsor>UMBC News &amp; Magazine</Sponsor>
<PawCount>0</PawCount>
<CommentCount>0</CommentCount>
<CommentsAllowed>false</CommentsAllowed>
<PostedAt>Mon, 11 Nov 2013 14:00:36 -0500</PostedAt>
</NewsItem>

<NewsItem contentIssues="true" id="38226" important="false" status="posted" url="https://my3.my.umbc.edu/posts/38226">
<Title>Authentication With Laravel 4</Title>
<Body>
<![CDATA[
    <div class="html-content">
    <a href="http://rss.buysellads.com/click.php?z=1260013&amp;k=d754f1e9ba63a736ba8ff5ece958f7dd&amp;a=35593&amp;c=1455394499" rel="nofollow external" class="bo"><img src="http://rss.buysellads.com/img.php?z=1260013&amp;k=d754f1e9ba63a736ba8ff5ece958f7dd&amp;a=35593&amp;c=1455394499" alt="" style="max-width: 100%; height: auto;"></a><p>Authentication is required for virtually any type of web application. In this tutorial, I’d like to show you how you can go about creating a small authentication application using <a href="http://laravel.com/" rel="nofollow external" class="bo">Laravel 4</a>. We’ll start from the very beginning by creating our Laravel app using composer, creating the database, loading in the Twitter Bootstrap, creating a main layout, registering users, logging in and out, and protecting routes using filters. We’ve got a lot of code to cover, so let’s get started!</p>
    <p></p>
    <hr>
    <h2>Installation</h2>
    <p>Let’s start off this tutorial by setting up everything that we’ll need in order to build our authentication application. We’ll first need to download and install Laravel plus all of its dependencies. We’ll also utilize the popular Twitter Bootstrap to make our app look pretty. Then we’ll do a tad bit of configuration, connect to our database and create the required table and finally, start up our server to make sure everything is working as expected.</p>
    <h3>Download</h3>
    <p>Let’s use composer to create a new Laravel application. I’ll first change directories into my <code>Sites</code> folder as that’s where I prefer to store all of my apps:</p>
    <pre>cd Sites</pre>
    <p>Then run the following command to download and install Laravel (I named my app <code>laravel-auth</code>) and all of its dependencies:</p>
    <pre>composer create-project laravel/laravel laravel-auth</pre>
    <h3>Add In Twitter Bootstrap</h3>
    <p>Now to keep our app from suffering a horrible and ugly fate of being styled by yours truly, we’ll include the Twitter bootstrap within our <code>composer.json</code> file:</p>
    <pre>{&#x000A;    	"name": "laravel/laravel",&#x000A;    	"description": "The Laravel Framework.",&#x000A;    	"keywords": ["framework", "laravel"],&#x000A;    	"require": {&#x000A;    		"laravel/framework": "4.0.*",&#x000A;    		"twitter/bootstrap": "*"&#x000A;    	},&#x000A;    &#x000A;    	// The rest of your composer.json file below ....&#x000A;    </pre>
    <p>… and then we can install it:</p>
    <pre>composer update&#x000A;    </pre>
    <p>Now if you open up your app into your text editor, I’m using Sublime, and if you look in the <code>vendor</code> folder you’ll see we have the Twitter Bootstrap here.</p>  <img src="http://cdn.tutsplus.com/net/uploads/2013/11/laravel-auth-twitter-bootstrap-installed.jpg" alt="laravel-auth-twitter-bootstrap-installed" width="600" height="554" style="max-width: 100%; height: auto;"><br> <p>Now by default our Twitter Bootstrap is composed of <code>.less</code> files and before we can compile them into <code>.CSS</code> files, we need to install all of the bootstrap dependencies. This will also allow us to use the <code>Makefile</code> that is included with the Twitter bootstrap for working with the framework (such as compiling files and running tests).</p>
    <p>Note: You will need <a href="https://npmjs.org/" rel="nofollow external" class="bo">npm</a> in order to install these dependencies.</p>
    <p>In your terminal, let’s change directories into <code>vendor/twitter/bootstrap</code> and run <code>npm install</code>:</p>
    <pre>cd ~/Sites/laravel-auth/vendor/twitter/bootstrap&#x000A;    npm install&#x000A;    </pre>
    <p>With everything ready to go, we can now use the <code>Makefile</code> to compile the <code>.less</code> files into CSS. Let’s run the following command:</p>
    <pre>make bootstrap-css&#x000A;    </pre>
    <p>You should now notice that we have two new folders inside our <code>vendor/twitter/bootstrap</code> directory named <code>bootstrap/css</code> which contain our bootstrap CSS files.</p>  <img src="http://cdn.tutsplus.com/net/uploads/2013/11/laravel-auth-css-compiled.jpg" alt="laravel-auth-css-compiled" width="600" height="807" style="max-width: 100%; height: auto;"><br> <p>Now we can use the bootstrap CSS files later on, in our layout, to style our app.</p>
    <p>But, we have a problem! We need these CSS files to be publicly accessible, currently they are located in our <code>vendor</code> folder. But this is an easy fix! We can use artisan to <code>publish</code> (move) them to our <code>public/packages</code> folder, that way we can link in the required CSS files into our main layout template, which we’ll create later on.</p>
    <p>First, we’ll change back into the root of our Laravel application and then run artisan to move the files:</p>
    <pre>cd ~/Sites/laravel-auth&#x000A;    php artisan asset:publish --path="vendor/twitter/bootstrap/bootstrap/css" bootstrap/css&#x000A;    </pre>
    <p>The artisan command <code>asset:publish</code> allows us to provide a <code>--path</code> option for which files we want to move into our <code>public/packages</code> directory. In this case, we tell it to publish all of the CSS files that we compiled earlier and place them inside of two new folders named <code>bootstrap/css</code>. Your <code>public</code> directory should now look like the screenshot below, with our Twitter Bootstrap CSS files now publicly accessible:</p>  <img src="http://cdn.tutsplus.com/net/uploads/2013/11/laravel-auth-bootstrap-css-moved-to-public.jpg" alt="laravel-auth-bootstrap-css-moved-to-public" width="600" height="624" style="max-width: 100%; height: auto;"><br> <h3>Set Permissions</h3>
    <p>Next we need to ensure our web server has the appropriate permissions to write to our applications <code>app/storage</code> directory. From within your app, run the following command:</p>
    <pre>chmod -R 755 app/storage</pre>
    <h3>Connect To Our Database</h3>
    <p>Next, we need a database that our authentication app can use to store our users in. So fire up whichever database you are more comfortable using, personally, I prefer MySQL along with PHPMyAdmin. I’ve created a new, empty database named: <code>laravel-auth</code>.</p>  <img src="http://cdn.tutsplus.com/net/uploads/2013/11/laravel-auth-database-creation.jpg" alt="laravel-auth-database-creation" width="600" height="427" style="max-width: 100%; height: auto;"><br> <p>Now let’s connect this database to our application. Under <code>app/config</code> open up <code>database.php</code>. Enter in your appropriate database credentials, mine are as follows:</p>
    <pre>// Default Database Connection Name&#x000A;    &#x000A;    'default' =&gt; 'mysql',&#x000A;    &#x000A;    // Database Connections&#x000A;    &#x000A;    	'connections' =&gt; array(&#x000A;    &#x000A;    		'mysql' =&gt; array(&#x000A;    			'driver'    =&gt; 'mysql',&#x000A;    			'host'      =&gt; '127.0.0.1',&#x000A;    			'database'  =&gt; 'laravel-auth',&#x000A;    			'username'  =&gt; 'root',&#x000A;    			'password'  =&gt; '',&#x000A;    			'charset'   =&gt; 'utf8',&#x000A;    			'collation' =&gt; 'utf8_unicode_ci',&#x000A;    			'prefix'    =&gt; '',&#x000A;    		),&#x000A;    &#x000A;    		// the rest of your database.php file's code ...&#x000A;    </pre>
    <h3>Create the Users Table</h3>
    <p>With our database created, it won’t be very useful unless we have a table to store our users in. Let’s use artisan to create a new migration file named: <code>create-users-table</code>:</p>
    <pre>php artisan migrate:make create-users-table</pre>
    <p>Let’s now edit our newly created migration file to create our <code>users</code>table using the <a href="http://four.laravel.com/docs/schema" rel="nofollow external" class="bo">Schema Builder</a>. We’ll start with the <code>up()</code> method:</p>
    <pre>public function up()&#x000A;    {&#x000A;    	$table-&gt;increments('id');&#x000A;    	$table-&gt;string('firstname', 20);&#x000A;    	$table-&gt;string('lastname', 20);&#x000A;    	$table-&gt;string('email', 100)-&gt;unique();&#x000A;    	$table-&gt;string('password', 64);&#x000A;    	$table-&gt;timestamps();&#x000A;    }&#x000A;    </pre>
    <p>This will create a table named <code>users</code> and it will have an <code>id</code> field as the primary key, <code>firstname</code> and <code>lastname</code> fields, an <code>email</code> field which requires the email to be unique, and finally a field for the <code>password</code> (must be at least 64 characters in length) as well as a few <code>timestamps</code>.</p>
    <p>Now we need to fill in the <code>down()</code> method in case we need to revert our migration, to drop the <code>users</code> table:</p>
    <pre>public function down()&#x000A;    {&#x000A;    	Schema::drop('users');&#x000A;    }&#x000A;    </pre>
    <p>And now we can run the migration to create our <code>users</code> table:</p>
    <pre>php artisan migrate</pre>
    <h3>Start Server &amp; Test It Out</h3>
    <p>Alright, our authentication application is coming along nicely. We’ve done quite a bit of preparation, let’s start up our server and preview our app in the browser:</p>
    <pre>php artisan serve</pre>
    <p>Great, the server starts up and we can see our home page:</p>  <img src="http://cdn.tutsplus.com/net/uploads/2013/11/laravel-auth-home-page.jpg" alt="laravel-auth-home-page" width="600" height="457" style="max-width: 100%; height: auto;"><br> <hr>
    <h2>Making the App Look Pretty</h2>
    <p>Before we go any further, it’s time to create a main layout file, which will use the Twitter Bootstrap to give our authentication application a little style!</p>
    <h3>Creating a Main Layout File</h3>
    <p>Under <code>app/views/</code> create a new folder named <code>layouts</code> and inside it, create a new file named <code>main.blade.php</code> and let’s place in the following basic HTML structure:</p>
    <pre>&lt;!DOCTYPE html&gt;&#x000A;    &lt;html lang="en"&gt;&#x000A;      &lt;head&gt;&#x000A;        &lt;meta charset="utf-8"&gt;&#x000A;        &lt;meta name="viewport" content="width=device-width, initial-scale=1.0"&gt;&#x000A;    &#x000A;        &lt;title&gt;Authentication App With Laravel 4&lt;/title&gt;&#x000A;      &lt;/head&gt;&#x000A;    &#x000A;      &lt;body&gt;&#x000A;    &#x000A;      &lt;/body&gt;&#x000A;    &lt;/html&gt;&#x000A;    </pre>
    <h3>Linking In the CSS Files</h3>
    <p>Next, we need to link in our bootstrap CSS file as well as our own <code>main</code> CSS file, in our <code>head</code> tag, right below our <code>title</code>:</p>
    <pre>	&lt;head&gt;&#x000A;        	&lt;meta charset="utf-8"&gt;&#x000A;        	&lt;meta name="viewport" content="width=device-width, initial-scale=1.0"&gt;&#x000A;    &#x000A;        	&lt;title&gt;Authentication App With Laravel 4&lt;/title&gt;&#x000A;        	{{ HTML::style('packages/bootstrap/css/bootstrap.min.css') }}&#x000A;        	{{ HTML::style('css/main.css')}}&#x000A;      	&lt;/head&gt;&#x000A;    </pre>
    <p>Now we just need to create this <code>main.css</code> file where we can add our own customized styling for our app. Under the <code>public</code> directory create a new folder named <code>css</code> and within it create a new file named <code>main.css</code>.</p>  <img src="http://cdn.tutsplus.com/net/uploads/2013/11/laravel-auth-add-main-css-file.jpg" alt="laravel-auth-add-main-css-file" width="600" height="514" style="max-width: 100%; height: auto;"><br> <h3>Finishing the Main Layout</h3>
    <p>Inside of our <code>body</code> tag, let’s create a small navigation menu with a few links for registering and logging in to our application:</p>
    <pre>&lt;body&gt;&#x000A;    &#x000A;      	&lt;div class="navbar navbar-fixed-top"&gt;&#x000A;    	  	&lt;div class="navbar-inner"&gt;&#x000A;    	    	&lt;div class="container"&gt;&#x000A;    				&lt;ul class="nav"&gt;  &#x000A;    					&lt;li&gt;{{ HTML::link('users/register', 'Register') }}&lt;/li&gt;   &#x000A;    					&lt;li&gt;{{ HTML::link('users/login', 'Login') }}&lt;/li&gt;   &#x000A;    				&lt;/ul&gt;  &#x000A;    	    	&lt;/div&gt;&#x000A;    	  	&lt;/div&gt;&#x000A;    	&lt;/div&gt; &#x000A;    &#x000A;    &lt;/body&gt;&#x000A;    </pre>
    <p>Notice the use of several Bootstrap classes in order to style the navbar appropriately. Here we’re just using a couple of DIVs to wrap an unordered list of navigation links, pretty simple.</p>
    <p>For our application, we’re going to want to give our users simple flash messages, like a success message when the user registers. We’ll set this flash message from within our controller, but we’ll echo out the message’s value here in our layout. So let’s create another <code>div</code> with a class of <code>.container</code> and display any available flash messages right after our navbar:</p>
    <pre>&lt;body&gt;&#x000A;    &#x000A;      	&lt;div class="navbar navbar-fixed-top"&gt;&#x000A;    	  	&lt;div class="navbar-inner"&gt;&#x000A;    	    	&lt;div class="container"&gt;&#x000A;    				&lt;ul class="nav"&gt;  &#x000A;    					&lt;li&gt;{{ HTML::link('users/register', 'Register') }}&lt;/li&gt;   &#x000A;    					&lt;li&gt;{{ HTML::link('users/login', 'Login') }}&lt;/li&gt;   &#x000A;    				&lt;/ul&gt;  &#x000A;    	    	&lt;/div&gt;&#x000A;    	  	&lt;/div&gt;&#x000A;    	&lt;/div&gt; &#x000A;                &#x000A;    &#x000A;        &lt;div class="container"&gt;&#x000A;        	@if(Session::has('message'))&#x000A;    			&lt;p class="alert"&gt;{{ Session::get('message') }}&lt;/p&gt;&#x000A;    		@endif&#x000A;        &lt;/div&gt;&#x000A;    &#x000A;    	&lt;/body&gt;&#x000A;    </pre>
    <p>To display the flash message, I’ve first used a Blade <code>if</code> statement to check if we have a flash message to display. Our flash message will be available in the Session under <code>message</code>. So we can use the <code>Session::has()</code> method to check for that message. If that evaluates to true, we create a paragraph with the Twitter bootstrap class of <code>alert</code> and we call the <code>Session::get()</code> method to display the message’s value.</p>
    <p>Now lastly, at least for our layout file, let’s echo out a <code>$content</code> variable, right after our flash message. This will allow us to tell our controller to use this layout file, and our views will be displayed in place of this <code>$content</code> variable, right here in the layout:</p>
    <pre>&lt;body&gt;&#x000A;    &#x000A;      	&lt;div class="navbar navbar-fixed-top"&gt;&#x000A;    	  	&lt;div class="navbar-inner"&gt;&#x000A;    	    	&lt;div class="container"&gt;&#x000A;    				&lt;ul class="nav"&gt;  &#x000A;    					&lt;li&gt;{{ HTML::link('users/register', 'Register') }}&lt;/li&gt;   &#x000A;    					&lt;li&gt;{{ HTML::link('users/login', 'Login') }}&lt;/li&gt;   &#x000A;    				&lt;/ul&gt;  &#x000A;    	    	&lt;/div&gt;&#x000A;    	  	&lt;/div&gt;&#x000A;    	&lt;/div&gt; &#x000A;                &#x000A;    &#x000A;        &lt;div class="container"&gt;&#x000A;        	@if(Session::has('message'))&#x000A;    			&lt;p class="alert"&gt;{{ Session::get('message') }}&lt;/p&gt;&#x000A;    		@endif&#x000A;    &#x000A;    		{{ $content }}&#x000A;        &lt;/div&gt;&#x000A;    &#x000A;    	&lt;/body&gt;&#x000A;    </pre>
    <hr>
    <h2>Custom Styling</h2>
    <p>Now that we have our layout complete, we just need to add a few small custom CSS rules to our <code>main.css</code> file to customize our layout a little bit more. Go ahead and add in the following bit of CSS, it’s pretty self explanatory:</p>
    <pre>body {&#x000A;    	padding-top: 40px;&#x000A;    }&#x000A;    &#x000A;    .form-signup, .form-signin {&#x000A;    	width: 400px;&#x000A;    	margin: 0 auto;&#x000A;    }&#x000A;    </pre>
    <p>I added just a small amount of padding to the top of the <code>body</code> tag in order to prevent our navbar from overlapping our main content. Then I target the Bootstrap’s <code>.form-signup</code> and <code>.form-signin</code> classes, which we’ll be applying to our register and login forms in order to set their width and center them on the page.</p>
    <hr>
    <h2>Creating the Register Page</h2>
    <p>It’s now time to start building the first part of our authentication application and that is our Register page.</p>
    <h3>The Users Controller</h3>
    <p>We’ll start by creating a new <code>UsersController</code> within our <code>app/controllers</code> folder and in it, we define our <code>UsersController</code> class:</p>
    <pre>&lt;?php&#x000A;    &#x000A;    class UsersController extends BaseController {&#x000A;    &#x000A;    }&#x000A;    ?&gt;&#x000A;    </pre>
    <p>Next, let’s tell this controller to use our <code>main.blade.php</code> layout. At the top of our controller set the <code>$layout</code> property:</p>
    <pre>&lt;?php&#x000A;    &#x000A;    class UsersController extends BaseController {&#x000A;    	protected $layout = "layouts.main";&#x000A;    }&#x000A;    ?&gt;&#x000A;    </pre>
    <p>Now within our <code>UsersController</code>, we need an action for our register page. I named my action <code>getRegister</code>:</p>
    <pre>public function getRegister() {&#x000A;    	$this-&gt;layout-&gt;content = View::make('users.register');&#x000A;    }&#x000A;    </pre>
    <p>Here we just set the <code>content</code> layout property (this is the <code>$content</code> variable we echo’d out in our layout file) to display a <code>users.register</code> view file.</p>
    <h3>The Users Controller Routes</h3>
    <p>With our controller created next we need to setup the routes for all of the actions we might create within our controller. Inside of our <code>app/routes.php</code> file let’s first remove the default <code>/</code> route and then add in the following code to create our <code>UsersController</code> routes:</p>
    <pre>Route::controller('users', 'UsersController');&#x000A;    </pre>
    <p>Now anytime that we create a new action, it will be available using a URI in the following format: <code>/users/actionName</code>. For example, we have a <code>getRegister</code> action, we can access this using the following URI: <code>/users/register</code>.</p>
    <p>Note that we don’t include the “get” part of the action name in the URI, “get” is just the HTTP verb that the action responds to.</p>
    <h3>Creating the Register View</h3>
    <p>Inside of <code>app/views</code> create a new folder named <code>users</code>. This will hold all of our <code>UsersController</code>‘s view files. Inside the <code>users</code> folder create a new file named <code>register.blade.php</code> and place the following code inside of it:</p>
    <pre>{{ Form::open(array('url'=&gt;'users/create', 'class'=&gt;'form-signup')) }}&#x000A;    	&lt;h2 class="form-signup-heading"&gt;Please Register&lt;/h2&gt;&#x000A;    &#x000A;    	&lt;ul&gt;&#x000A;    		@foreach($errors-&gt;all() as $error)&#x000A;    			&lt;li&gt;{{ $error }}&lt;/li&gt;&#x000A;    		@endforeach&#x000A;    	&lt;/ul&gt;&#x000A;    &#x000A;    	{{ Form::text('firstname', null, array('class'=&gt;'input-block-level', 'placeholder'=&gt;'First Name')) }}&#x000A;    	{{ Form::text('lastname', null, array('class'=&gt;'input-block-level', 'placeholder'=&gt;'Last Name')) }}&#x000A;    	{{ Form::text('email', null, array('class'=&gt;'input-block-level', 'placeholder'=&gt;'Email Address')) }}&#x000A;    	{{ Form::password('password', array('class'=&gt;'input-block-level', 'placeholder'=&gt;'Password')) }}&#x000A;    	{{ Form::password('password_confirmation', array('class'=&gt;'input-block-level', 'placeholder'=&gt;'Confirm Password')) }}&#x000A;    &#x000A;    	{{ Form::submit('Register', array('class'=&gt;'btn btn-large btn-primary btn-block'))}}&#x000A;    {{ Form::close() }}&#x000A;    </pre>
    <p>Here we use the <code>Form</code> class to create our register form. First we call the <code>open()</code> method, passing in an array of options. We tell the form to submit to a URI of <code>users/create</code> by setting the <code>url</code> key. This URI will be used to process the registration of the user. We’ll handle this next. After setting the <code>url</code> we then give the form a class of <code>form-signup</code>.</p>
    <p>After opening the form, we just have an <code>h2</code> heading with the <code>.form-signup-heading</code> class.</p>
    <p>Next, we use a <code>@foreach</code> loop, looping over all of the form validation error messages and displaying each <code>$error</code> in the unordered list.</p>
    <p>After the form validation error messages, we then we create several form input fields, each with a class of <code>input-block-level</code> and a placeholder value. We have inputs for the firstname, lastname, email, password, and password confirmation fields. The second argument to the <code>text()</code> method is set to <code>null</code>, since we’re using a <code>placeholder</code>, we don’t need to set the input fields value attribute, so I just set it to <code>null</code> in this case.</p>
    <p>After the input fields, we then create our submit button and apply several different classes to it so the Twitter bootstrap handles the styling for us.</p>
    <p>Lastly, we just close the form using the <code>close()</code> method.</p>
    <p>Make sure to start up your server, switch to your favorite browser, and if we browse to <code><a href="http://localhost:8000/users/register">http://localhost:8000/users/register</a></code> you should see your register page:</p>  <img src="http://cdn.tutsplus.com/net/uploads/2013/11/laravel-auth-register-page.jpg" alt="laravel-auth-register-page" width="600" height="460" style="max-width: 100%; height: auto;"><br> <hr>
    <h2>Processing the Register Form Submission</h2>
    <p>Now if you tried filling out the register form’s fields and hitting the <strong>Register</strong> button you would have been greeted with a <code>NotFoundHttpException</code>, and this is because we have no route that matches the <code>users/create</code> URI, because we do not have an action to process the form submission. So that’s our next step!</p>
    <h3>Creating a <code>postCreate</code> Action</h3>
    <p>Inside of your <code>UsersController</code> let’s create another action named <code>postCreate</code>:</p>
    <pre>public function postCreate() {&#x000A;    		&#x000A;    }&#x000A;    </pre>
    <p>Now this action needs to handle processing the form submission by validating the data and either displaying validation error messages or it should create the new user, hashing the user’s password, and saving the user into the database.</p>
    <h3>Form Validation</h3>
    <p>Let’s start with validating the form submission’s data. We first need to create our validation rules that we’ll validate the form data against. I prefer storing my validation rules in my model as that’s the convention I’m used to, from working with other frameworks. By default, Laravel ships with a <code>User.php</code> model already created for you.</p>
    <p>Make sure you don’t delete this User model or remove any of the preexisting code, as it contains new code that is required for Laravel 4′s authentication to work correctly. Your User model must implement <code>UserInterface</code> and <code>RemindableInterface</code> as well as implement the <code>getAuthIdentifier()</code> and <code>getAuthPassword()</code> methods.</p>
    <p>Under <code>app/models</code> open up that <code>User.php</code> file and at the top, add in the following code:</p>
    <pre>public static $rules = array(&#x000A;    	'firstname'=&gt;'required|alpha|min:2',&#x000A;    	'lastname'=&gt;'required|alpha|min:2',&#x000A;    	'email'=&gt;'required|email|unique:users',&#x000A;    	'password'=&gt;'required|alpha_num|between:6,12|confirmed',&#x000A;    	'password_confirmation'=&gt;'required|alpha_num|between:6,12'&#x000A;    	);&#x000A;    </pre>
    <p>Here I’m validating the <code>firstname</code> and <code>lastname</code> fields to ensure they are present, only contain alpha characters, and that they are at least two characters in length. Next, I validate the <code>email</code> field to ensure that it’s present, that it is a valid email address, and that it is unique to the users table, as we don’t want to have duplicate email addresses for our users. Lastly, I validate the <code>password</code> and <code>password_confirmation</code> fields. I ensure they are both present, contain only alpha-numeric characters and that they are between six and twelve characters in length. Additionally, notice the <code>confirmed</code> validation rule, this makes sure that the <code>password</code> field is exactly the same as the matching <code>password_confirmation</code> field, to ensure users have entered in the correct password.</p>
    <p>Now that we have our validation rules, we can use these in our <code>UsersController</code> to validate the form submission. In your <code>UsersController</code>‘s <code>postCreate</code> action, let’s start by checking if the data passes validation, add in the following code:</p>
    <pre>public function postCreate() {&#x000A;    	$validator = Validator::make(Input::all(), User::$rules);&#x000A;    &#x000A;    	if ($validator-&gt;passes()) {&#x000A;    		// validation has passed, save user in DB&#x000A;    	} else {&#x000A;    		// validation has failed, display error messages	&#x000A;    	}&#x000A;    }&#x000A;    }&#x000A;    </pre>
    <p>We start by creating a validator object named <code>$validator</code> by calling the <code>User::validate()</code> method. This accepts the two arguments, the submitted form input that should be validated and the validation rules that the data should be validated against. We can grab the submitted form data by calling the <code>Input::all()</code> method and we pass that in as the first argument. We can get our validation rules that we created in our <code>User</code> model by accessing the static <code>User::$rules</code> property and passing that in as the second argument.</p>
    <p>Once we’ve created our validator object, we call its <code>passes()</code> method. This will return either <code>true</code> or <code>false</code> and we use this within an <code>if</code> statement to check whether our data has passed validation.</p>
    <p>Within our <code>if</code> statement, if the validation has passed, add in the following code:</p>
    <pre>if ($validator-&gt;passes()) {&#x000A;    	$user = new User;&#x000A;    	$user-&gt;firstname = Input::get('firstname');&#x000A;    	$user-&gt;lastname = Input::get('lastname');&#x000A;    	$user-&gt;email = Input::get('email');&#x000A;    	$user-&gt;password = Hash::make(Input::get('password'));&#x000A;    	$user-&gt;save();&#x000A;    &#x000A;    	return Redirect::to('users/login')-&gt;with('message', 'Thanks for registering!');&#x000A;    } else {&#x000A;    	// validation has failed, display error messages	&#x000A;    }&#x000A;    </pre>
    <p>As long as the data that the user submits has passed validation, we create a new instance of our User model: <code>new User;</code> storing it into a <code>$user</code> variable. We can then use the <code>$user</code> object and set each of the user’s properties using the submitted form data. We can grab the submitted data individually using the <code>Input::get('fieldName')</code> method. Where <code>fieldName</code> is the field’s value you want to retrieve. Here we’ve grabbed the firstname, lastname, and email fields to use for our new user. We also grabbed the password field’s value, but we don’t just want to store the password in the database as plain text, so we use the <code>Hash::make()</code> method to hash the submitted password for us before saving it. Lastly, we save the user into the database by calling the <code>$user</code> object’s <code>save()</code> method.</p>
    <p>After creating the new user, we then redirect the user to the login page (we’ll create the login page in a few moments) using the <code>Redirect::to()</code> method. This just takes in the URI of where you’d like to redirect to. We also chain on the <code>with()</code> method call in order to give the user a flash message letting them know that their registration was successful.</p>
    <p>Now if the validation does not pass, we need to redisplay the register page, along with some validation error messages, with the old input, so the user can correct their mistakes. Within your <code>else</code> statement, add in the following code:</p>
    <pre>if ($validator-&gt;passes()) {&#x000A;    	$user = new User;&#x000A;    	$user-&gt;firstname = Input::get('firstname');&#x000A;    	$user-&gt;lastname = Input::get('lastname');&#x000A;    	$user-&gt;email = Input::get('email');&#x000A;    	$user-&gt;password = Hash::make(Input::get('password'));&#x000A;    	$user-&gt;save();&#x000A;    &#x000A;    	return Redirect::to('users/login')-&gt;with('message', 'Thanks for registering!');&#x000A;    } else {&#x000A;    	return Redirect::to('users/register')-&gt;with('message', 'The following errors occurred')-&gt;withErrors($validator)-&gt;withInput();&#x000A;    }&#x000A;    </pre>
    <p>Here we just redirect the user back to the register page with a flash message letting them know some errors have occurred. We make sure to display the validation error messages by calling the <code>withErrors($validator)</code> method and passing in our <code>$validator</code> object to it. Finally, we call the <code>withInput()</code> method so the form remembers what the user originally typed in and that will make it nice and easy for the user to correct the errors.</p>
    <h3>Adding In the CSRF Before Filter</h3>
    <p>Now we need to make sure to protect our POST actions from CSRF attacks by setting the CSRF before filter within our <code>UsersController</code>‘s constructor method. At the top of your <code>UsersController</code> add in the following code:</p>
    <pre>public function __construct() {&#x000A;    	$this-&gt;beforeFilter('csrf', array('on'=&gt;'post'));&#x000A;    }&#x000A;    </pre>
    <p>Within our constructor, we call the <code>beforeFilter()</code> method and pass in the string <code>csrf</code>, as the first argument. <code>csrf</code> is the filter that we want to apply to our actions. Then we pass in an array as the second argument and tell it to only apply this filter on POST requests. By doing this, our forms will pass along a CSRF token whenever they are submitted. This CSRF before filter will ensure that all POST requests to our app contain this token, giving us confidence that POST requests are not being issued to our application from other external sources.</p>
    <hr>
    <h2>Creating the Login Page</h2>
    <p>Before you run off and try out your register page, we first need to create the Login page so that when our register form submission is successful, we don’t get an error. Remember, if the form validation passes, we save the user and redirect them to the login page. We currently don’t have this login page though, so let’s create it!</p>
    <p>Still inside of your <code>UsersController</code>, create a new action named <code>getLogin</code> and place in the following code:</p>
    <pre>public function getLogin() {&#x000A;    	$this-&gt;layout-&gt;content = View::make('users.login');&#x000A;    }&#x000A;    </pre>
    <p>This will display a <code>users.login</code> view file. We now need to create that view file. Under <code>app/views/users</code> create a new file named <code>login.blade.php</code> and add in the following code:</p>
    <pre>{{ Form::open(array('url'=&gt;'users/signin', 'class'=&gt;'form-signin')) }}&#x000A;    	&lt;h2 class="form-signin-heading"&gt;Please Login&lt;/h2&gt;&#x000A;    &#x000A;    	{{ Form::text('email', null, array('class'=&gt;'input-block-level', 'placeholder'=&gt;'Email Address')) }}&#x000A;    	{{ Form::password('password', array('class'=&gt;'input-block-level', 'placeholder'=&gt;'Password')) }}&#x000A;    &#x000A;    	{{ Form::submit('Login', array('class'=&gt;'btn btn-large btn-primary btn-block'))}}&#x000A;    {{ Form::close() }}&#x000A;    </pre>
    <p>This code is very similar to the code we used in our <code>register</code> view, so I’ll simplify the explanation this time to only what is different. For this form, we have it submit to a <code>users/signin</code> URI and we changed the form’s class to <code>.form-signin</code>. The <code>h2</code> has been changed to say “Please Login” and its class was also changed to <code>.form-signin-heading</code>. Next, we have two form fields so the user can enter in their email and password, and then finally our submit button which just says “Login”.</p>
    <h3>Let’s Register a New User!</h3>
    <p>We’re finally at a point to where we can try out our registration form. Of course, the login functionality doesn’t work just yet, but we’ll get to that soon enough. We only needed the login page to exist so that our register page would work properly. Make sure your server is still running, switch into your browser, and visit <code><a href="http://localhost:8000/users/register">http://localhost:8000/users/register</a></code>. Try entering in some invalid user data to test out the form validation error messages. Here’s what my page looks like with an invalid user:</p>  <img src="http://cdn.tutsplus.com/net/uploads/2013/11/laravel-auth-displaying-errors.jpg" alt="laravel-auth-displaying-errors" width="600" height="461" style="max-width: 100%; height: auto;"><br> <p>Now try registering with valid user data. This time we get redirected to our login page along with our success message, excellent!</p>  <img src="http://cdn.tutsplus.com/net/uploads/2013/11/laravel-auth-successful-registration.jpg" alt="laravel-auth-successful-registration" width="600" height="461" style="max-width: 100%; height: auto;"><br> <hr>
    <h2>Logging In</h2>
    <p>So we’ve successfully registered a new user and we have a login page, but we still can’t login. We now need to create the <code>postSignin</code> action for our <code>users/signin</code> URI, that our login form submits to. Let’s go back into our <code>UsersController</code> and create a new action named <code>postSignin</code>:</p>
    <pre>public function postSignin() {&#x000A;    			&#x000A;    }&#x000A;    </pre>
    <p>Now let’s log the user in, using the submitted data from the login form. Add the following code into your <code>postSignin()</code> action:</p>
    <pre>if (Auth::attempt(array('email'=&gt;Input::get('email'), 'password'=&gt;Input::get('password')))) {&#x000A;    	return Redirect::to('users/dashboard')-&gt;with('message', 'You are now logged in!');&#x000A;    } else {&#x000A;    	return Redirect::to('users/login')&#x000A;    		-&gt;with('message', 'Your username/password combination was incorrect')&#x000A;    		-&gt;withInput();&#x000A;    }&#x000A;    </pre>
    <p>Here we attempt to log the user in, using the <code>Auth::attempt()</code> method. We simply pass in an array containing the user’s email and password that they submitted from the login form. This method will return either <code>true</code> or <code>false</code> if the user’s credentials validate. So we can use this <code>attempt()</code> method within an <code>if</code> statement. If the user was logged in, we just redirect them to a <code>dashboard</code> view page and give them a success message. Otherwise, the user’s credentials did not validate and in that case we redirect them back to the login page, with an error message, and display the old input so the user can try again.</p>
    <h3>Creating the Dashboard</h3>
    <p>Now before you attempt to login with your newly registered user, we need to create that dashboard page and protect it from unauthorized, non logged in users. The dashboard page should only be accessible to those users who have registered and logged in to our application. Otherwise, if a non authorized user attempts to visit the dashboard we’ll redirect them and request that they log in first.</p>
    <p>While still inside of your <code>UsersController</code> let’s create a new action named <code>getDashboard</code>:</p>
    <pre>public function getDashboard() {&#x000A;    	&#x000A;    }&#x000A;    </pre>
    <p>And inside of this action we’ll just display a <code>users.dashboard</code> view file:</p>
    <pre>public function getDashboard() {&#x000A;    	$this-&gt;layout-&gt;content = View::make('users.dashboard');&#x000A;    }&#x000A;    </pre>
    <p>Next, we need to protect it from unauthorized users by using the <code>auth</code> before filter. In our <code>UsersController</code>‘s constructor, add in the following code:</p>
    <pre>public function __construct() {&#x000A;    	$this-&gt;beforeFilter('csrf', array('on'=&gt;'post'));&#x000A;    	$this-&gt;beforeFilter('auth', array('only'=&gt;array('getDashboard')));&#x000A;    }&#x000A;    </pre>
    <p>This will use the <code>auth</code> filter, which checks if the current user is logged in. If the user is not logged in, they get redirected to the login page, essentially denying the user access. Notice that I’m also passing in an array as a second argument, by setting the <code>only</code> key, I can tell this before filter to only apply it to the provided actions. In this case, I’m saying to protect only the <code>getDashboard</code> action.</p>
    <h3>Customizing Filters</h3>
    <p>By default the <code>auth</code> filter will redirect users to a <code>/login</code> URI, this does not work for our application though. We need to modify this filter so that it redirects to a <code>users/login</code> URI instead, otherwise get an error. Open up <code>app/filters.php</code> and in the <strong>Authentication Filters</strong> section, change the <strong>auth</strong> filter to redirect to <code>users/login</code>, like this:</p>
    <pre>/*&#x000A;    |--------------------------------------------------------------------------&#x000A;    | Authentication Filters&#x000A;    |--------------------------------------------------------------------------&#x000A;    |&#x000A;    | The following filters are used to verify that the user of the current&#x000A;    | session is logged into this application. The "basic" filter easily&#x000A;    | integrates HTTP Basic authentication for quick, simple checking.&#x000A;    |&#x000A;    */&#x000A;    &#x000A;    Route::filter('auth', function()&#x000A;    {&#x000A;    	if (Auth::guest()) return Redirect::guest('users/login');&#x000A;    });&#x000A;    </pre>
    <h3>Creating the Dashboard View</h3>
    <p>Before we can log users into our application we need to create that <code>dashboard</code> view file. Under <code>app/views/users</code> create a new file named <code>dashboard.blade.php</code> and insert the following snippet of code:</p>
    <pre>&lt;h1&gt;Dashboard&lt;/h1&gt;&#x000A;    &#x000A;    &lt;p&gt;Welcome to your Dashboard. You rock!&lt;/p&gt;&#x000A;    </pre>
    <p>Here I’m displaying a very simple paragraph to let the user know they are now in their Dashboard.</p>
    <h3>Let’s Login!</h3>
    <p>We should now be able to login. Browse to <code><a href="http://localhost:8000/users/login">http://localhost:8000/users/login</a></code>, enter in your user’s credentials, and give it a try.</p>  <img src="http://cdn.tutsplus.com/net/uploads/2013/11/laravel-auth-logged-in.jpg" alt="laravel-auth-logged-in" width="600" height="452" style="max-width: 100%; height: auto;"><br> <p>Success!</p>
    <hr>
    <h2>Displaying the Appropriate Navigation Links</h2>
    <p>Ok, we can now register and login to our application, very cool! But we have a little quirk here, if you look at our navigation menu, even though we’re logged in, you can see that the register and login buttons are still viewable. Ideally, we want these to only display when the user is not logged in. Once the user does login though, we want to display a logout link. To make this change, let’s open up our <code>main.blade.php</code> file again. Here’s what our navbar code looks like at the moment:</p>
    <pre>&lt;div class="navbar navbar-fixed-top"&gt;&#x000A;      	&lt;div class="navbar-inner"&gt;&#x000A;        	&lt;div class="container"&gt;&#x000A;    			&lt;ul class="nav"&gt;  &#x000A;    				&lt;li&gt;{{ HTML::link('users/register', 'Register') }}&lt;/li&gt;   &#x000A;    				&lt;li&gt;{{ HTML::link('users/login', 'Login') }}&lt;/li&gt;   &#x000A;    			&lt;/ul&gt;  &#x000A;        	&lt;/div&gt;&#x000A;      	&lt;/div&gt;&#x000A;    &lt;/div&gt; &#x000A;    </pre>
    <p>Let’s modify this slightly, replacing our original navbar code, with the following:</p>
    <pre>&lt;div class="navbar navbar-fixed-top"&gt;&#x000A;      	&lt;div class="navbar-inner"&gt;&#x000A;        	&lt;div class="container"&gt;&#x000A;    			&lt;ul class="nav"&gt;  &#x000A;    				@if(!Auth::check())&#x000A;    					&lt;li&gt;{{ HTML::link('users/register', 'Register') }}&lt;/li&gt;   &#x000A;    					&lt;li&gt;{{ HTML::link('users/login', 'Login') }}&lt;/li&gt;   &#x000A;    				@else&#x000A;    					&lt;li&gt;{{ HTML::link('users/logout', 'logout') }}&lt;/li&gt;&#x000A;    				@endif&#x000A;    			&lt;/ul&gt;  &#x000A;        	&lt;/div&gt;&#x000A;      	&lt;/div&gt;&#x000A;    &lt;/div&gt; &#x000A;    </pre>
    <p>All I’ve done is wrapped our <code>li</code> tags for our navbar in an <code>if</code> statement to check if the user is <em>not</em> logged in, using the <code>!Auth::check()</code> method. This method returns <code>true</code> if the user is logged in, otherwise, <code>false</code>. So if the user is not logged in, we display the register and login links, otherwise, the user is logged in and we display a logout link, instead.</p>  <img src="http://cdn.tutsplus.com/net/uploads/2013/11/laravel-auth-logout-link.jpg" alt="laravel-auth-logout-link" width="600" height="452" style="max-width: 100%; height: auto;"><br> <hr>
    <h2>Logging Out</h2>
    <p>Now that our navbar displays the appropriate links, based on the user’s logged in status, let’s wrap up this application by creating the <code>getLogout</code> action, to actually log the user out. Within your <code>UsersController</code> create a new action named <code>getLogout</code>:</p>
    <pre>public function getLogout() {&#x000A;    	&#x000A;    }&#x000A;    </pre>
    <p>Now add in the following snippet of code to log the user out:</p>
    <pre>public function getLogout() {&#x000A;    	Auth::logout();&#x000A;    	return Redirect::to('users/login')-&gt;with('message', 'Your are now logged out!');&#x000A;    }&#x000A;    </pre>
    <p>Here we call the <code>Auth::logout()</code> method, which handles logging the user out for us. Afterwards, we redirect the user back to the login page and give them a flash message letting them know that they have been logged out.</p>  <img src="http://cdn.tutsplus.com/net/uploads/2013/11/laravel-auth-logged-out.jpg" alt="laravel-auth-logged-out" width="600" height="450" style="max-width: 100%; height: auto;"><br> <hr>
    <h2>Conclusion</h2>
    <p>And that concludes this Laravel 4 Authentication tutorial. I hope you’ve found this helpful in setting up auth for your Laravel apps. If you have any problems or questions, feel free to ask in the comments and I’ll try my best to help you out. You can checkout the <a href="https://github.com/tutsplus/laravel-4-authentication" rel="nofollow external" class="bo">complete source code</a> for the small demo app that we built throughout this tutorial on Github. Thanks for reading.</p>
    </div>
]]>
</Body>
<Summary>Authentication is required for virtually any type of web application. In this tutorial, I’d like to show you how you can go about creating a small authentication application using Laravel 4. We’ll...</Summary>
<Website>http://feedproxy.google.com/~r/nettuts/~3/15QhuM1VFts/</Website>
<TrackingUrl>https://my3.my.umbc.edu/api/v0/pixel/news/38226/guest@my.umbc.edu/fac6ff6fd6ef02c94cd2b967fe5e06b4/api/pixel</TrackingUrl>
<Tag>authentication</Tag>
<Tag>css</Tag>
<Tag>development</Tag>
<Tag>html</Tag>
<Tag>javascript</Tag>
<Tag>mysql</Tag>
<Tag>php</Tag>
<Tag>sql</Tag>
<Tag>tutorials</Tag>
<Tag>wed</Tag>
<Group token="retired-583">Web Developer - Build Group</Group>
<GroupUrl>https://my3.my.umbc.edu/groups/retired-583</GroupUrl>
<AvatarUrl>https://assets3-my.umbc.edu/system/shared/avatars/groups/000/000/583/fc60f5d7abc2e080599bb6dc465db54d/xsmall.png?1363101197</AvatarUrl>
<AvatarUrl size="original">https://assets4-my.umbc.edu/system/shared/avatars/groups/000/000/583/fc60f5d7abc2e080599bb6dc465db54d/original.jpg?1363101197</AvatarUrl>
<AvatarUrl size="xxlarge">https://assets4-my.umbc.edu/system/shared/avatars/groups/000/000/583/fc60f5d7abc2e080599bb6dc465db54d/xxlarge.png?1363101197</AvatarUrl>
<AvatarUrl size="xlarge">https://assets4-my.umbc.edu/system/shared/avatars/groups/000/000/583/fc60f5d7abc2e080599bb6dc465db54d/xlarge.png?1363101197</AvatarUrl>
<AvatarUrl size="large">https://assets3-my.umbc.edu/system/shared/avatars/groups/000/000/583/fc60f5d7abc2e080599bb6dc465db54d/large.png?1363101197</AvatarUrl>
<AvatarUrl size="medium">https://assets3-my.umbc.edu/system/shared/avatars/groups/000/000/583/fc60f5d7abc2e080599bb6dc465db54d/medium.png?1363101197</AvatarUrl>
<AvatarUrl size="small">https://assets4-my.umbc.edu/system/shared/avatars/groups/000/000/583/fc60f5d7abc2e080599bb6dc465db54d/small.png?1363101197</AvatarUrl>
<AvatarUrl size="xsmall">https://assets3-my.umbc.edu/system/shared/avatars/groups/000/000/583/fc60f5d7abc2e080599bb6dc465db54d/xsmall.png?1363101197</AvatarUrl>
<AvatarUrl size="xxsmall">https://assets4-my.umbc.edu/system/shared/avatars/groups/000/000/583/fc60f5d7abc2e080599bb6dc465db54d/xxsmall.png?1363101197</AvatarUrl>
<Sponsor>Web Developer - Build Group</Sponsor>
<PawCount>0</PawCount>
<CommentCount>0</CommentCount>
<CommentsAllowed>true</CommentsAllowed>
<PostedAt>Mon, 11 Nov 2013 13:19:34 -0500</PostedAt>
<EditAt>Mon, 11 Nov 2013 13:19:34 -0500</EditAt>
</NewsItem>

<NewsItem contentIssues="true" id="38221" important="false" status="posted" url="https://my3.my.umbc.edu/posts/38221">
<Title>Phishing Scam Alert - Subject: IT Service Help Desk</Title>
<Tagline>UMBC would never ask "users are to verify there accounts."</Tagline>
<Body>
<![CDATA[
    <div class="html-content">
    <p>A new phishing scam is threatening to deactivate email accounts. This email is not from UMBC. <strong>Do not click this link.</strong></p>
    <p><br></p>
    <p>Here's what's being received:</p>
    <p><br></p>
    <p>"This E-mail is sent by the HelpDesk Expert for IT Support system for Mailbox notification and update purposes. We are conducting an email sweep upgrade due to our new login home page that is coming up soon for your better and faster server. So we are removing all unused email and registration of all active Student/Staff mail account to enable the University create new logins for our 2013/2014 students and staff. So all users are to verify there accounts.</p>
    <p><br></p>
    <p><strong>CLICK HERE:</strong> To go to verification page and follow the instructions on the popup page</p>
    <p><br></p>
    <p>IMPORTANT NOTICE: ACCOUNT OWNER THAT REFUSES TO VERIFY/UPGRADE HIS/HER ACCOUNT WILL LEADS TO YOUR ACCOUNT DE-ACTIVATION WITHIN 48 HOURS PRIOR TO THE URGENT THAT CONTAINED IN THIS SHEET.</p>
    <p><br></p>
    <p>Copyright@2013 Help-desk Technical Support Centre."</p>
    <p><br></p>
    <p><br></p>
    <p><strong>Again: Do Not Click The Link. If you already did, please change your password immediately.</strong></p>
    </div>
]]>
</Body>
<Summary>A new phishing scam is threatening to deactivate email accounts. This email is not from UMBC. Do not click this link.     Here's what's being received:     "This E-mail is sent by the HelpDesk...</Summary>
<TrackingUrl>https://my3.my.umbc.edu/api/v0/pixel/news/38221/guest@my.umbc.edu/f7dbd1d0dd47e16dc9b7046b2ac56402/api/pixel</TrackingUrl>
<Tag>phishing</Tag>
<Tag>security</Tag>
<Group token="doit">Division of Information Technology (DoIT)</Group>
<GroupUrl>https://my3.my.umbc.edu/groups/doit</GroupUrl>
<AvatarUrl>https://assets2-my.umbc.edu/system/shared/avatars/groups/000/000/021/d27760c5de12c74b73faec8d0e631acf/xsmall.png?1727453227</AvatarUrl>
<AvatarUrl size="original">https://assets2-my.umbc.edu/system/shared/avatars/groups/000/000/021/d27760c5de12c74b73faec8d0e631acf/original.JPG?1727453227</AvatarUrl>
<AvatarUrl size="xxlarge">https://assets1-my.umbc.edu/system/shared/avatars/groups/000/000/021/d27760c5de12c74b73faec8d0e631acf/xxlarge.png?1727453227</AvatarUrl>
<AvatarUrl size="xlarge">https://assets3-my.umbc.edu/system/shared/avatars/groups/000/000/021/d27760c5de12c74b73faec8d0e631acf/xlarge.png?1727453227</AvatarUrl>
<AvatarUrl size="large">https://assets2-my.umbc.edu/system/shared/avatars/groups/000/000/021/d27760c5de12c74b73faec8d0e631acf/large.png?1727453227</AvatarUrl>
<AvatarUrl size="medium">https://assets2-my.umbc.edu/system/shared/avatars/groups/000/000/021/d27760c5de12c74b73faec8d0e631acf/medium.png?1727453227</AvatarUrl>
<AvatarUrl size="small">https://assets2-my.umbc.edu/system/shared/avatars/groups/000/000/021/d27760c5de12c74b73faec8d0e631acf/small.png?1727453227</AvatarUrl>
<AvatarUrl size="xsmall">https://assets2-my.umbc.edu/system/shared/avatars/groups/000/000/021/d27760c5de12c74b73faec8d0e631acf/xsmall.png?1727453227</AvatarUrl>
<AvatarUrl size="xxsmall">https://assets4-my.umbc.edu/system/shared/avatars/groups/000/000/021/d27760c5de12c74b73faec8d0e631acf/xxsmall.png?1727453227</AvatarUrl>
<Sponsor>Division of Information Technology</Sponsor>
<ThumbnailUrl size="xxlarge">https://assets3-my.umbc.edu/system/shared/thumbnails/news/000/038/221/c9ae486d4193a28218ebcf092e1a1659/xxlarge.jpg?1384191638</ThumbnailUrl>
<ThumbnailUrl size="xlarge">https://assets1-my.umbc.edu/system/shared/thumbnails/news/000/038/221/c9ae486d4193a28218ebcf092e1a1659/xlarge.jpg?1384191638</ThumbnailUrl>
<ThumbnailUrl size="large">https://assets4-my.umbc.edu/system/shared/thumbnails/news/000/038/221/c9ae486d4193a28218ebcf092e1a1659/large.jpg?1384191638</ThumbnailUrl>
<ThumbnailUrl size="medium">https://assets3-my.umbc.edu/system/shared/thumbnails/news/000/038/221/c9ae486d4193a28218ebcf092e1a1659/medium.jpg?1384191638</ThumbnailUrl>
<ThumbnailUrl size="small">https://assets2-my.umbc.edu/system/shared/thumbnails/news/000/038/221/c9ae486d4193a28218ebcf092e1a1659/small.jpg?1384191638</ThumbnailUrl>
<ThumbnailUrl size="xsmall">https://assets1-my.umbc.edu/system/shared/thumbnails/news/000/038/221/c9ae486d4193a28218ebcf092e1a1659/xsmall.jpg?1384191638</ThumbnailUrl>
<ThumbnailUrl size="xxsmall">https://assets2-my.umbc.edu/system/shared/thumbnails/news/000/038/221/c9ae486d4193a28218ebcf092e1a1659/xxsmall.jpg?1384191638</ThumbnailUrl>
<PawCount>84</PawCount>
<CommentCount>7</CommentCount>
<CommentsAllowed>true</CommentsAllowed>
<PostedAt>Mon, 11 Nov 2013 12:48:18 -0500</PostedAt>
<EditAt>Fri, 25 Mar 2016 11:47:31 -0400</EditAt>
</NewsItem>

<NewsItem contentIssues="true" id="38245" important="false" status="posted" url="https://my3.my.umbc.edu/posts/38245">
<Title>A Co-President Quits Disney&#8217;s Video Game and Web Unit</Title>
<Body>
<![CDATA[
    <div class="html-content">John Pleasants, the hard-charging co-chief of Disney’s video game and web division, is expected to remain with the company through January as a consultant.<br><div><table border="0"><tbody><tr><td>
    <a href="http://share.feedsportal.com/share/twitter/?u=http%3A%2F%2Fwww.nytimes.com%2F2013%2F11%2F12%2Fbusiness%2Fmedia%2Fjohn-pleasants-resigns-as-co-president-of-disney-interactive.html%3Fpartner%3Drss%26emc%3Drss&amp;t=A+Co-President+Quits+Disney%E2%80%99s+Video+Game+and+Web+Unit" rel="nofollow external" class="bo"><img src="http://res3.feedsportal.com/social/twitter.png" style="max-width: 100%; height: auto;"></a> <a href="http://share.feedsportal.com/share/facebook/?u=http%3A%2F%2Fwww.nytimes.com%2F2013%2F11%2F12%2Fbusiness%2Fmedia%2Fjohn-pleasants-resigns-as-co-president-of-disney-interactive.html%3Fpartner%3Drss%26emc%3Drss&amp;t=A+Co-President+Quits+Disney%E2%80%99s+Video+Game+and+Web+Unit" rel="nofollow external" class="bo"><img src="http://res3.feedsportal.com/social/facebook.png" style="max-width: 100%; height: auto;"></a> <a href="http://share.feedsportal.com/share/linkedin/?u=http%3A%2F%2Fwww.nytimes.com%2F2013%2F11%2F12%2Fbusiness%2Fmedia%2Fjohn-pleasants-resigns-as-co-president-of-disney-interactive.html%3Fpartner%3Drss%26emc%3Drss&amp;t=A+Co-President+Quits+Disney%E2%80%99s+Video+Game+and+Web+Unit" rel="nofollow external" class="bo"><img src="http://res3.feedsportal.com/social/linkedin.png" style="max-width: 100%; height: auto;"></a> <a href="http://share.feedsportal.com/share/gplus/?u=http%3A%2F%2Fwww.nytimes.com%2F2013%2F11%2F12%2Fbusiness%2Fmedia%2Fjohn-pleasants-resigns-as-co-president-of-disney-interactive.html%3Fpartner%3Drss%26emc%3Drss&amp;t=A+Co-President+Quits+Disney%E2%80%99s+Video+Game+and+Web+Unit" rel="nofollow external" class="bo"><img src="http://res3.feedsportal.com/social/googleplus.png" style="max-width: 100%; height: auto;"></a> <a href="http://share.feedsportal.com/share/email/?u=http%3A%2F%2Fwww.nytimes.com%2F2013%2F11%2F12%2Fbusiness%2Fmedia%2Fjohn-pleasants-resigns-as-co-president-of-disney-interactive.html%3Fpartner%3Drss%26emc%3Drss&amp;t=A+Co-President+Quits+Disney%E2%80%99s+Video+Game+and+Web+Unit" rel="nofollow external" class="bo"><img src="http://res3.feedsportal.com/social/email.png" style="max-width: 100%; height: auto;"></a>
    </td></tr></tbody></table></div>
    </div>
]]>
</Body>
<Summary>John Pleasants, the hard-charging co-chief of Disney’s video game and web division, is expected to remain with the company through January as a consultant.      </Summary>
<Website>http://www.nytimes.com/2013/11/12/business/media/john-pleasants-resigns-as-co-president-of-disney-interactive.html?partner=rss&amp;emc=rss</Website>
<TrackingUrl>https://my3.my.umbc.edu/api/v0/pixel/news/38245/guest@my.umbc.edu/c54b14d7c80515424131fde78f037f24/api/pixel</TrackingUrl>
<Tag>apple-inc-aapl-nasdaq</Tag>
<Tag>computer-and-video-games</Tag>
<Tag>computers-and-the-internet</Tag>
<Tag>electronic-arts-inc-erts-nasdaq</Tag>
<Tag>facebook-inc-fb-nasdaq</Tag>
<Tag>new</Tag>
<Tag>pleasants-john</Tag>
<Tag>technology</Tag>
<Tag>walt-disney-company-dis-nyse</Tag>
<Tag>york</Tag>
<Group token="retired-583">Web Developer - Build Group</Group>
<GroupUrl>https://my3.my.umbc.edu/groups/retired-583</GroupUrl>
<AvatarUrl>https://assets3-my.umbc.edu/system/shared/avatars/groups/000/000/583/fc60f5d7abc2e080599bb6dc465db54d/xsmall.png?1363101197</AvatarUrl>
<AvatarUrl size="original">https://assets4-my.umbc.edu/system/shared/avatars/groups/000/000/583/fc60f5d7abc2e080599bb6dc465db54d/original.jpg?1363101197</AvatarUrl>
<AvatarUrl size="xxlarge">https://assets4-my.umbc.edu/system/shared/avatars/groups/000/000/583/fc60f5d7abc2e080599bb6dc465db54d/xxlarge.png?1363101197</AvatarUrl>
<AvatarUrl size="xlarge">https://assets4-my.umbc.edu/system/shared/avatars/groups/000/000/583/fc60f5d7abc2e080599bb6dc465db54d/xlarge.png?1363101197</AvatarUrl>
<AvatarUrl size="large">https://assets3-my.umbc.edu/system/shared/avatars/groups/000/000/583/fc60f5d7abc2e080599bb6dc465db54d/large.png?1363101197</AvatarUrl>
<AvatarUrl size="medium">https://assets3-my.umbc.edu/system/shared/avatars/groups/000/000/583/fc60f5d7abc2e080599bb6dc465db54d/medium.png?1363101197</AvatarUrl>
<AvatarUrl size="small">https://assets4-my.umbc.edu/system/shared/avatars/groups/000/000/583/fc60f5d7abc2e080599bb6dc465db54d/small.png?1363101197</AvatarUrl>
<AvatarUrl size="xsmall">https://assets3-my.umbc.edu/system/shared/avatars/groups/000/000/583/fc60f5d7abc2e080599bb6dc465db54d/xsmall.png?1363101197</AvatarUrl>
<AvatarUrl size="xxsmall">https://assets4-my.umbc.edu/system/shared/avatars/groups/000/000/583/fc60f5d7abc2e080599bb6dc465db54d/xxsmall.png?1363101197</AvatarUrl>
<Sponsor>Web Developer - Build Group</Sponsor>
<PawCount>0</PawCount>
<CommentCount>0</CommentCount>
<CommentsAllowed>true</CommentsAllowed>
<PostedAt>Mon, 11 Nov 2013 12:40:28 -0500</PostedAt>
</NewsItem>

<NewsItem contentIssues="false" id="38218" important="false" status="posted" url="https://my3.my.umbc.edu/posts/38218">
<Title>Give to the John Jeffries International Fellowship</Title>
<Body>
<![CDATA[
    <div class="html-content">
    <p>Dean John Jeffries retired at the end of June after forty years of service to UMBC. In recognition of his profound impact on UMBC, we are delighted to announce the establishment of the <strong>John Jeffries International Fellowship</strong>.</p>
    <p>The Fellowship fund honors John’s commitment to building a strong and distinctive undergraduate curriculum and to educating students to become informed and engaged global citizens.  The Fellowship will provide faculty with resources to create, or redesign, and teach a course in their fields in order to add or enhance an explicit international or transnational focus. Our expectation is that the resulting courses will be taught regularly and will broaden the intellectual scope of the curriculum in the College of Arts, Humanities, and Social Sciences.</p>
    <p>In a matter of weeks, current and former Department Chairs, Program Directors, and Associate Deans in the College of Arts, Humanities, and Social Sciences have contributed more than $25,000 to endow the John Jeffries Fellowship. Since then, others have contributed towards the goal of $200,000, which will enable the campus to support two Jeffries Fellows each year.</p>
    <p>If you are interested in making a gift to the John Jeffries International Fellowship Program or have any questions, please contact <a rel="nofollow external" class="bo">Marjoleine Kars</a>, <a rel="nofollow external" class="bo">Jason Loviglio</a>, or <a rel="nofollow external" class="bo">Carole McCann</a>.</p>
    <div><br></div>
    </div>
]]>
</Body>
<Summary>Dean John Jeffries retired at the end of June after forty years of service to UMBC. In recognition of his profound impact on UMBC, we are delighted to announce the establishment of the John...</Summary>
<Website>http://my.umbc.edu/news/29447</Website>
<TrackingUrl>https://my3.my.umbc.edu/api/v0/pixel/news/38218/guest@my.umbc.edu/7d82130ea50fde1c4d9d49bdc648ff2a/api/pixel</TrackingUrl>
<Group token="history">History Department News and Events</Group>
<GroupUrl>https://my3.my.umbc.edu/groups/history</GroupUrl>
<AvatarUrl>https://assets3-my.umbc.edu/system/shared/avatars/groups/000/000/496/0e975254c6e211f21a5cca6eb2cf1a82/xsmall.png?1582059722</AvatarUrl>
<AvatarUrl size="original">https://assets2-my.umbc.edu/system/shared/avatars/groups/000/000/496/0e975254c6e211f21a5cca6eb2cf1a82/original.png?1582059722</AvatarUrl>
<AvatarUrl size="xxlarge">https://assets3-my.umbc.edu/system/shared/avatars/groups/000/000/496/0e975254c6e211f21a5cca6eb2cf1a82/xxlarge.png?1582059722</AvatarUrl>
<AvatarUrl size="xlarge">https://assets3-my.umbc.edu/system/shared/avatars/groups/000/000/496/0e975254c6e211f21a5cca6eb2cf1a82/xlarge.png?1582059722</AvatarUrl>
<AvatarUrl size="large">https://assets3-my.umbc.edu/system/shared/avatars/groups/000/000/496/0e975254c6e211f21a5cca6eb2cf1a82/large.png?1582059722</AvatarUrl>
<AvatarUrl size="medium">https://assets4-my.umbc.edu/system/shared/avatars/groups/000/000/496/0e975254c6e211f21a5cca6eb2cf1a82/medium.png?1582059722</AvatarUrl>
<AvatarUrl size="small">https://assets2-my.umbc.edu/system/shared/avatars/groups/000/000/496/0e975254c6e211f21a5cca6eb2cf1a82/small.png?1582059722</AvatarUrl>
<AvatarUrl size="xsmall">https://assets3-my.umbc.edu/system/shared/avatars/groups/000/000/496/0e975254c6e211f21a5cca6eb2cf1a82/xsmall.png?1582059722</AvatarUrl>
<AvatarUrl size="xxsmall">https://assets2-my.umbc.edu/system/shared/avatars/groups/000/000/496/0e975254c6e211f21a5cca6eb2cf1a82/xxsmall.png?1582059722</AvatarUrl>
<Sponsor>History Department News and Events</Sponsor>
<PawCount>2</PawCount>
<CommentCount>0</CommentCount>
<CommentsAllowed>true</CommentsAllowed>
<PostedAt>Mon, 11 Nov 2013 12:24:44 -0500</PostedAt>
</NewsItem>

<NewsItem contentIssues="false" id="38217" important="false" status="posted" url="https://my3.my.umbc.edu/posts/38217">
<Title>Courtney Hobson (MA Historical Studies, '14) published!</Title>
<Body>
<![CDATA[
    <div class="html-content">Congratulate our current MA student Courtney Hobson on publishing a review of Sotterley Plantation's exhibit in The Public Historian.<br><a href="http://history.umbc.edu/alumni-news/hobson-on-sotterley-plantation/" rel="nofollow external" class="bo">http://history.umbc.edu/alumni-news/hobson-on-sotterley-plantation/ </a><br>
    </div>
]]>
</Body>
<Summary>Congratulate our current MA student Courtney Hobson on publishing a review of Sotterley Plantation's exhibit in The Public Historian....</Summary>
<Website>http://history.umbc.edu/alumni-news/hobson-on-sotterley-plantation/</Website>
<TrackingUrl>https://my3.my.umbc.edu/api/v0/pixel/news/38217/guest@my.umbc.edu/ecf71e5cefcc63ce1e8590fdc34cd67a/api/pixel</TrackingUrl>
<Group token="history">History Department News and Events</Group>
<GroupUrl>https://my3.my.umbc.edu/groups/history</GroupUrl>
<AvatarUrl>https://assets3-my.umbc.edu/system/shared/avatars/groups/000/000/496/0e975254c6e211f21a5cca6eb2cf1a82/xsmall.png?1582059722</AvatarUrl>
<AvatarUrl size="original">https://assets2-my.umbc.edu/system/shared/avatars/groups/000/000/496/0e975254c6e211f21a5cca6eb2cf1a82/original.png?1582059722</AvatarUrl>
<AvatarUrl size="xxlarge">https://assets3-my.umbc.edu/system/shared/avatars/groups/000/000/496/0e975254c6e211f21a5cca6eb2cf1a82/xxlarge.png?1582059722</AvatarUrl>
<AvatarUrl size="xlarge">https://assets3-my.umbc.edu/system/shared/avatars/groups/000/000/496/0e975254c6e211f21a5cca6eb2cf1a82/xlarge.png?1582059722</AvatarUrl>
<AvatarUrl size="large">https://assets3-my.umbc.edu/system/shared/avatars/groups/000/000/496/0e975254c6e211f21a5cca6eb2cf1a82/large.png?1582059722</AvatarUrl>
<AvatarUrl size="medium">https://assets4-my.umbc.edu/system/shared/avatars/groups/000/000/496/0e975254c6e211f21a5cca6eb2cf1a82/medium.png?1582059722</AvatarUrl>
<AvatarUrl size="small">https://assets2-my.umbc.edu/system/shared/avatars/groups/000/000/496/0e975254c6e211f21a5cca6eb2cf1a82/small.png?1582059722</AvatarUrl>
<AvatarUrl size="xsmall">https://assets3-my.umbc.edu/system/shared/avatars/groups/000/000/496/0e975254c6e211f21a5cca6eb2cf1a82/xsmall.png?1582059722</AvatarUrl>
<AvatarUrl size="xxsmall">https://assets2-my.umbc.edu/system/shared/avatars/groups/000/000/496/0e975254c6e211f21a5cca6eb2cf1a82/xxsmall.png?1582059722</AvatarUrl>
<Sponsor>History Department News and Events</Sponsor>
<PawCount>0</PawCount>
<CommentCount>0</CommentCount>
<CommentsAllowed>true</CommentsAllowed>
<PostedAt>Mon, 11 Nov 2013 12:21:31 -0500</PostedAt>
<EditAt>Mon, 11 Nov 2013 12:22:37 -0500</EditAt>
</NewsItem>

<NewsItem contentIssues="false" id="109939" important="false" status="posted" url="https://my3.my.umbc.edu/posts/109939">
<Title>Pete Caringi III Earns 2013 America East Men&#8217;s Soccer Fans&#8217; Choice Player of the Year</Title>
<Body>
<![CDATA[
    <div class="html-content">Earning 2,002 of the 5,523 total votes, UMBC senior striker Pete Caringi III (Perry Hall, Md./Cavlert Hall) earned the 2013 America East Men’s Soccer Fans’ Choice Player of the Year award. Caringi III received 36 percent of the vote, just barely edging out New Hampshire’s Ugochukwu Uche who had 35 percent and a total of 1,906 votes. Hartford’s Damion Lowe came in third with 12 percent of the vote (688) and Binghamton’s Robbie Hughes had nine percent (497). Caringi leads the conference and ranks 15th in the nation with 10 total goals, while also leading the league with 22 points. …</div>
]]>
</Body>
<Summary>Earning 2,002 of the 5,523 total votes, UMBC senior striker Pete Caringi III (Perry Hall, Md./Cavlert Hall) earned the 2013 America East Men’s Soccer Fans’ Choice Player of the Year award. Caringi...</Summary>
<Website>https://news.umbc.edu/pete-caringi-iii-earns-2013-america-east-mens-soccer-fans-choice-player-of-the-year/</Website>
<TrackingUrl>https://my3.my.umbc.edu/api/v0/pixel/news/109939/guest@my.umbc.edu/3223c51ba71b1eaee831105eeb297a60/api/pixel</TrackingUrl>
<Tag>community</Tag>
<Group token="umbc-news">UMBC News</Group>
<GroupUrl>https://my3.my.umbc.edu/groups/umbc-news</GroupUrl>
<AvatarUrl>https://assets2-my.umbc.edu/system/shared/avatars/groups/000/001/944/2c79aeea85b1abb37f8cf9fbcdc382b0/xsmall.png?1632921809</AvatarUrl>
<AvatarUrl size="original">https://assets4-my.umbc.edu/system/shared/avatars/groups/000/001/944/2c79aeea85b1abb37f8cf9fbcdc382b0/original.png?1632921809</AvatarUrl>
<AvatarUrl size="xxlarge">https://assets4-my.umbc.edu/system/shared/avatars/groups/000/001/944/2c79aeea85b1abb37f8cf9fbcdc382b0/xxlarge.png?1632921809</AvatarUrl>
<AvatarUrl size="xlarge">https://assets1-my.umbc.edu/system/shared/avatars/groups/000/001/944/2c79aeea85b1abb37f8cf9fbcdc382b0/xlarge.png?1632921809</AvatarUrl>
<AvatarUrl size="large">https://assets1-my.umbc.edu/system/shared/avatars/groups/000/001/944/2c79aeea85b1abb37f8cf9fbcdc382b0/large.png?1632921809</AvatarUrl>
<AvatarUrl size="medium">https://assets1-my.umbc.edu/system/shared/avatars/groups/000/001/944/2c79aeea85b1abb37f8cf9fbcdc382b0/medium.png?1632921809</AvatarUrl>
<AvatarUrl size="small">https://assets4-my.umbc.edu/system/shared/avatars/groups/000/001/944/2c79aeea85b1abb37f8cf9fbcdc382b0/small.png?1632921809</AvatarUrl>
<AvatarUrl size="xsmall">https://assets2-my.umbc.edu/system/shared/avatars/groups/000/001/944/2c79aeea85b1abb37f8cf9fbcdc382b0/xsmall.png?1632921809</AvatarUrl>
<AvatarUrl size="xxsmall">https://assets4-my.umbc.edu/system/shared/avatars/groups/000/001/944/2c79aeea85b1abb37f8cf9fbcdc382b0/xxsmall.png?1632921809</AvatarUrl>
<Sponsor>UMBC News</Sponsor>
<PawCount>0</PawCount>
<CommentCount>0</CommentCount>
<CommentsAllowed>false</CommentsAllowed>
<PostedAt>Mon, 11 Nov 2013 12:18:05 -0500</PostedAt>
</NewsItem>

<NewsItem contentIssues="true" id="38219" important="false" status="posted" url="https://my3.my.umbc.edu/posts/38219">
<Title>Scalable Web Design</Title>
<Body>
<![CDATA[
    <div class="html-content">
    <p>I can remember a time when pretty much everyone designed websites for an 800×600 screen resolution, but (thankfully) those days are long gone. Smart watches and 4k displays are pushing resolutions at both ends of the spectrum, and even more devices fill the gaps between, such as desktops, tablets, phones, and gaming consoles. In parallel, the density of pixels is increasing, too.</p>
    <div>
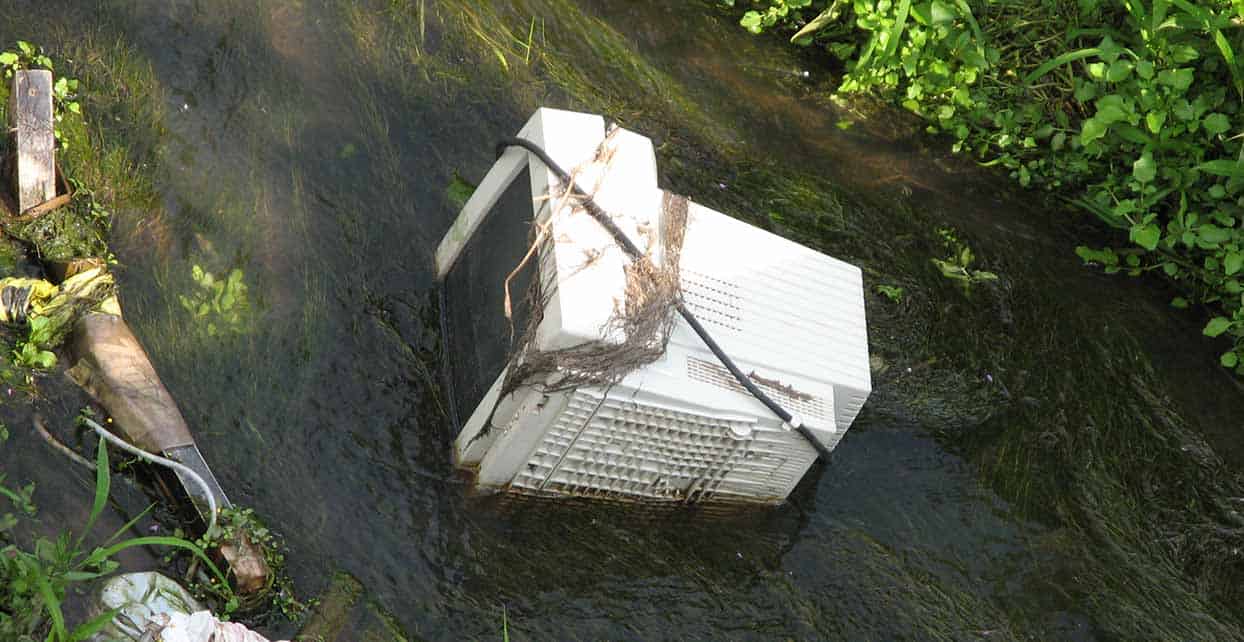
    <img src="http://blog.teamtreehouse.com/wp-content/uploads/2013/11/crt.jpg" alt="Photograph of a broken CRT monitor sitting in a river." width="1244" height="642" style="max-width: 100%; height: auto;"><p>Designing for a single screen resolution is dead. Photo courtesy Flickr user <a href="http://www.flickr.com/photos/endlisnis/210493241/" rel="nofollow external" class="bo">endlisnis</a>.</p>
    </div>
    <p>How can a web designer create sites that work on the devices of today <em>and</em> tomorrow? In this post, I propose a workflow called Scalable Web Design that attempts to address pixel density in a sustainable fashion.</p>
    <h2>We’ve Been Here Before</h2>
    <p>Fortunately, Responsive Web Design (RWD) came at just the right time and has since become the de facto solution for building modern websites. If you’re not familiar with it yet, the <a href="http://blog.teamtreehouse.com/beginners-guide-to-responsive-web-design" rel="nofollow external" class="bo">Beginner’s Guide to Responsive Web Design</a> will help you get caught up. The genius of RWD is that it works on current devices as well as devices that haven’t been dreamt up yet. No matter what kind of shiny new glowing rectangles are released in the next few years, chances are pretty good that a responsive website will require little to no changes.</p>
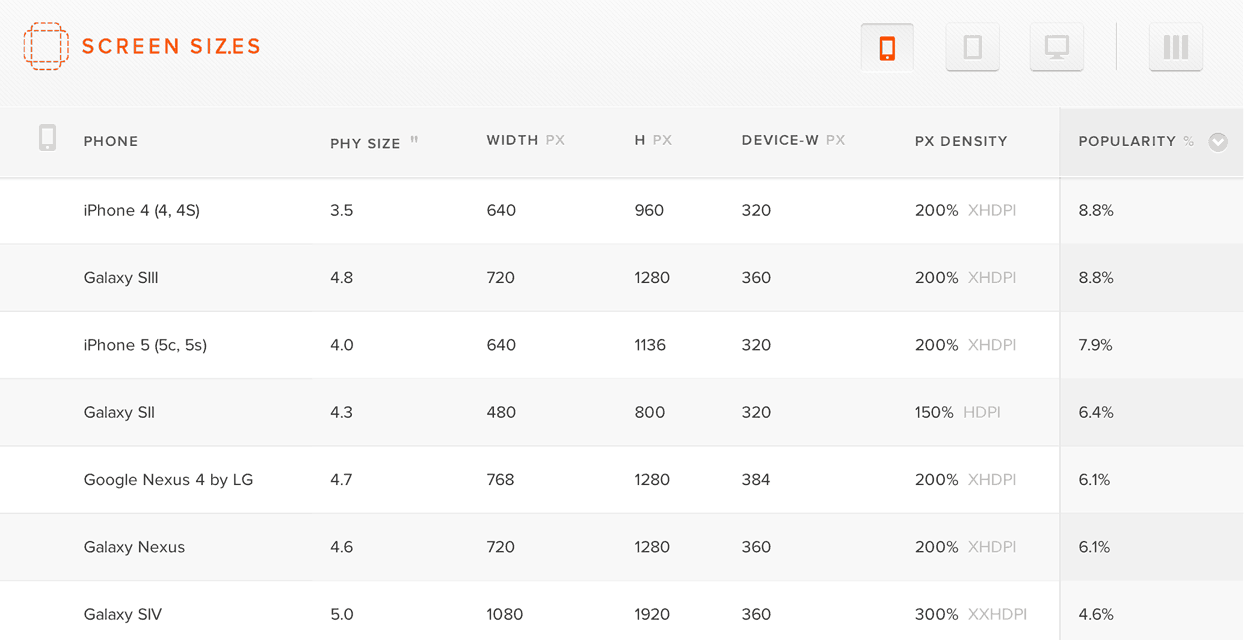
    <p>RWD solves the problem of device sizes, but some devices have a 1x pixel ratio, some are at 2x, still others are at 1.5x, and who knows what else. Check out this handy table at <a href="http://screensiz.es/" rel="nofollow external" class="bo">screensiz.es</a> to see what I mean.</p>
    <div>
    <a href="http://screensiz.es" rel="nofollow external" class="bo"><img alt="Screensiz.es provides tables of information about popular hardware devices." src="http://blog.teamtreehouse.com/wp-content/uploads/2013/11/screensizes.png" width="1244" height="640" style="max-width: 100%; height: auto;"></a><p><a href="http://screensiz.es" rel="nofollow external" class="bo">Screensiz.es</a> provides tables of information about popular hardware devices.</p>
    </div>
    <p>Once again, web designers are faced with a new rabbit hole of questions with fuzzy answers. Do you create 1x and 2x versions of all your images? Do you only use 2x for everything? What if 3x becomes popular?</p>
    <h2>Scalable Web Design</h2>
    <p>The problem of pixel densities is similar in spirit to the problem of screen sizes that RWD solves, so I’ve come up with a workflow that I’ve been calling “Scalable Web Design.” I’m sure some people will hate this term because scalable already can refer to building sites that are capable of handling lots of traffic, but you could say similar things about the term responsive. As long as it’s used in the context of design, I think it adequately encapsulates the idea of creating designs that scale with pixel density. If you agree or disagree, I’d love to hear your thoughts in the comments.</p>
    <p>So then, what are the steps for building a scalable design? Let’s break it down.</p>
    <h3>Step 1: Vector First</h3>
    <p>Rather than scramble to accommodate every new pixel density, it’s better to retool our thinking from the start. As mobile devices surge beyond the popularity of desktops, this shift in thinking has already started with the “<a href="http://www.lukew.com/resources/mobile_first.asp" rel="nofollow external" class="bo">mobile first</a>” approach (and rightly so). Now, I think it’s time we start thinking “vector first” as well. Check out <a href="http://codepen.io/nickpettit/full/AFjaw" rel="nofollow external" class="bo">this 19kb SVG example on CodePen</a> and notice how crisp it looks, even when it fills the page.</p>
    <p>See the Pen <a href="http://codepen.io/nickpettit/pen/AFjaw" rel="nofollow external" class="bo">AFjaw</a> by Nick Pettit (<a href="http://codepen.io/nickpettit" rel="nofollow external" class="bo">@nickpettit</a>) on <a href="http://codepen.io" rel="nofollow external" class="bo">CodePen</a></p>
    <p></p>
    <p>If you’re addicted to using Photoshop for everything, it’s time to start learning a vector based drawing program like Illustrator. Vector graphics like SVGs and icon fonts have considerable benefits over bitmap formats:</p>
    <ul>
    <li>Vectors can scale to virtually any pixel density. Only at very small sizes (like favicons) should you create a more customized graphic.</li>
    <li>Vectors typically have smaller file sizes than their bitmapped counterparts, especially when the comparison is between imagery with large dimensions.</li>
    <li>Vectors will never have any compression artifacts. They’ll always look sharp.</li>
    <li>Vectors are more future proof than bitmaps. If 2.5x or 3x or 4x screens catch on, your assets will be ready to go.</li>
    </ul>
    <p>Designing with vectors in mind from the start should prompt healthy thinking about aesthetic and technological choices. For example, if you only need to use 1 or 2 photographs and it’s going to mean including more code to serve multiple source images, it might make you reconsider whether or not that photograph is really necessary. I wouldn’t expect every web designer to create sites with 100% vector imagery, but it’s certainly worth using vectors where possible. The good news is, vectors work beautifully with the recent “flat design” aesthetic, as most vectors trend towards solid colors, sharp lines, and simple shapes.</p>
    <p>When it comes to vectors, you basically have the option of using icon fonts or SVGs. Icon fonts are great because there are lots of premade options and they boast smaller filesizes than SVGs. However, as Filament Group smartly pointed out, <a href="http://filamentgroup.com/lab/grumpicon_workflow/" rel="nofollow external" class="bo">browser support for icon fonts isn’t that great</a>. SVGs on the other hand are pretty well supported <em>and</em> they allow for full color graphics and gradients (font icons are monochromatic). Filament Group even created an awesome bitmap based fallback solution called <a href="http://www.grumpicon.com/" rel="nofollow external" class="bo">Grumpicon</a>. The workflow is simple:</p>
    <ol>
    <li>Export your SVGs from your vector package of choice. The default settings in Illustrator are fine.</li>
    <li>Drag and drop all your SVGs into Grumpicon.</li>
    <li>When you’re done, you get example code showing you how to use your SVGs as background images along with the fallback images. Awesome!</li>
    </ol>
    <p>For more detailed information about SVG browser support, here’s the handy <a href="http://caniuse.com/svg" rel="nofollow external" class="bo">caniuse.com SVG support table</a>.</p>
    <h3>Step 2: CSS Next</h3>
    <p>After you’ve created a vector layout, you should next look for areas where SVGs can be replaced with simple CSS. Designing with vectors has a tendency to lead towards flat color and simple shapes. Using CSS pseudo elements, it’s possible to create lots of shapes without adding any markup. To see lots of examples of shapes created with a single HTML element, check out <a href="http://css-tricks.com/examples/ShapesOfCSS/" rel="nofollow external" class="bo">The Shapes of CSS</a> on CSS-Tricks.</p>
    <div>
    <a href="http://css-tricks.com/examples/ShapesOfCSS/" rel="nofollow external" class="bo"><img src="http://blog.teamtreehouse.com/wp-content/uploads/2013/11/css-shapes.png" alt="Screenshot of an infinity symbol from The Shapes of CSS website." width="1244" height="640" style="max-width: 100%; height: auto;"></a><p>If you’ve never investigated CSS shapes before, you might be surprised by what’s possible.</p>
    </div>
    <p>Replacing SVGs with CSS will help reduce the number of assets you need to load, which makes for more performant pages. This step will pick up even more steam in the next few years when the <a href="http://blog.teamtreehouse.com/the-css-shapes-module-will-revolutionize-web-design" rel="nofollow external" class="bo">CSS shapes module</a> gains broad browser support.</p>
    <h3>Step 3: Bitmaps for Photographs</h3>
    <p>Vectors don’t work for extremely detailed images like photographs or screenshots, so you will still need to use bitmapped graphics there (the <a href="http://www.w3.org/TR/html-picture-element/" rel="nofollow external" class="bo">picture element</a> is looking like a promising solution in this case). However, limitations can be a great source of creativity.</p>
    <p>For example, Treehouse teacher <a href="https://twitter.com/mathelme" rel="nofollow external" class="bo">Mat Helme</a> created a website for a fictional conference called <a href="http://stopvisualpollution.com/" rel="nofollow external" class="bo">Stop Visual Pollution</a> and the site uses SVGs for all the images. It’s not perfectly responsive (as it’s only intended for demonstration purposes), but it’s a wonderful example of what vector based thinking can lead towards. He could have used photos for the speakers, but the illustrations are much more captivating. This graphically rich site is just 386kb total and it looks incredibly sharp on my 15″ retina display. To do this without vectors, you would need to use massive PNG images, which isn’t practical.</p>
    <div>
    <a href="http://stopvisualpollution.com/" rel="nofollow external" class="bo"><img alt="This is a screenshot of the website http://stopvisualpollution.com/ that features an illustration of Jessica Hische." src="http://blog.teamtreehouse.com/wp-content/uploads/2013/11/scalable-web-design.png" width="1244" height="640" style="max-width: 100%; height: auto;"></a><p>This screenshot of the fictional Stop Visual Pollution website shows how Mat used illustrations for each speaker instead of a photograph.</p>
    </div>
    <p>If you do need to use bitmaps, start out with the largest source material available. It might not ever get used in production, but it’s good to keep it handy in case you need it someday.</p>
    <p>As a general rule of thumb, it’s usually safe to provide a single 2x bitmap and call it a day. Modern browsers do a great job of scaling these down to 1x if necessary and the difference in filesize between 1x and 2x images is usually pretty small. That’s because you can apply a much greater amount of image compression to 2x images and they’ll still look good, because the compression artifacts have a tendency to wash out when the images are rescaled.</p>
    <p>For responsive designs, you may need to use multiple image sources that get served up based on the size of the screen. The picture element which I mentioned earlier looks like a promising for the future, but presently, there are numerous solutions that do this. Here are a few to get you started:</p>
    <ul>
    <li><a href="http://responsiveimages.org/" rel="nofollow external" class="bo">Responsive Images</a></li>
    <li><a href="http://zurb.com/playground/foundation-interchange" rel="nofollow external" class="bo">ZURB Interchange</a></li>
    <li><a href="http://adaptive-images.com/" rel="nofollow external" class="bo">Adaptive Images</a></li>
    </ul>
    <p>Many image source swapping solutions will also allow you to include imagery intended for higher pixel densities. If you do find that a higher number of your website visitors are using 3x devices and beyond, you’ll probably want to consider serving up 3x assets specifically for them (and not to other visitors as to not waste bandwidth). If you need help doing your density calculations, check out the <a href="http://www.teehanlax.com/blog/density-converter/" rel="nofollow external" class="bo">Teehan+Lax Density Converter</a>.</p>
    <h2>Tomorrow is Today</h2>
    <p>I think the advent of vectors came a bit faster than web professionals expected. For years SVGs were a dream from tomorrow, but Internet Explorer was the last holdout, and that threshold was crossed several versions ago now.</p>
    <p>Indeed, uncertainty is a part of web design, so we should embrace it. It’s impossible to predict every twist that technology will take next and create future proof designs, but vectors are a pretty good preventative measure.</p>
    <p>The post <a href="http://blog.teamtreehouse.com/scalable-web-design" rel="nofollow external" class="bo">Scalable Web Design</a> appeared first on <a href="http://blog.teamtreehouse.com" rel="nofollow external" class="bo">Treehouse Blog</a>.</p>
    </div>
]]>
</Body>
<Summary>I can remember a time when pretty much everyone designed websites for an 800×600 screen resolution, but (thankfully) those days are long gone. Smart watches and 4k displays are pushing resolutions...</Summary>
<Website>http://feedproxy.google.com/~r/teamtreehouse/~3/Xm2nfDb1RMA/scalable-web-design</Website>
<TrackingUrl>https://my3.my.umbc.edu/api/v0/pixel/news/38219/guest@my.umbc.edu/a2056c299511e7849241d909efc18698/api/pixel</TrackingUrl>
<Tag>android</Tag>
<Tag>css</Tag>
<Tag>design</Tag>
<Tag>development</Tag>
<Tag>html</Tag>
<Tag>ios</Tag>
<Tag>javascript</Tag>
<Tag>make-a-website</Tag>
<Tag>responsive</Tag>
<Tag>web</Tag>
<Group token="retired-583">Web Developer - Build Group</Group>
<GroupUrl>https://my3.my.umbc.edu/groups/retired-583</GroupUrl>
<AvatarUrl>https://assets3-my.umbc.edu/system/shared/avatars/groups/000/000/583/fc60f5d7abc2e080599bb6dc465db54d/xsmall.png?1363101197</AvatarUrl>
<AvatarUrl size="original">https://assets4-my.umbc.edu/system/shared/avatars/groups/000/000/583/fc60f5d7abc2e080599bb6dc465db54d/original.jpg?1363101197</AvatarUrl>
<AvatarUrl size="xxlarge">https://assets4-my.umbc.edu/system/shared/avatars/groups/000/000/583/fc60f5d7abc2e080599bb6dc465db54d/xxlarge.png?1363101197</AvatarUrl>
<AvatarUrl size="xlarge">https://assets4-my.umbc.edu/system/shared/avatars/groups/000/000/583/fc60f5d7abc2e080599bb6dc465db54d/xlarge.png?1363101197</AvatarUrl>
<AvatarUrl size="large">https://assets3-my.umbc.edu/system/shared/avatars/groups/000/000/583/fc60f5d7abc2e080599bb6dc465db54d/large.png?1363101197</AvatarUrl>
<AvatarUrl size="medium">https://assets3-my.umbc.edu/system/shared/avatars/groups/000/000/583/fc60f5d7abc2e080599bb6dc465db54d/medium.png?1363101197</AvatarUrl>
<AvatarUrl size="small">https://assets4-my.umbc.edu/system/shared/avatars/groups/000/000/583/fc60f5d7abc2e080599bb6dc465db54d/small.png?1363101197</AvatarUrl>
<AvatarUrl size="xsmall">https://assets3-my.umbc.edu/system/shared/avatars/groups/000/000/583/fc60f5d7abc2e080599bb6dc465db54d/xsmall.png?1363101197</AvatarUrl>
<AvatarUrl size="xxsmall">https://assets4-my.umbc.edu/system/shared/avatars/groups/000/000/583/fc60f5d7abc2e080599bb6dc465db54d/xxsmall.png?1363101197</AvatarUrl>
<Sponsor>Web Developer - Build Group</Sponsor>
<PawCount>0</PawCount>
<CommentCount>0</CommentCount>
<CommentsAllowed>true</CommentsAllowed>
<PostedAt>Mon, 11 Nov 2013 12:09:54 -0500</PostedAt>
</NewsItem>

<NewsItem contentIssues="true" id="38220" important="false" status="posted" url="https://my3.my.umbc.edu/posts/38220">
<Title>Join Us for the November Untangle the Web + Treehouse Meetup in London</Title>
<Body>
<![CDATA[
    <div class="html-content">
    <p><strong>When:</strong> Friday, Nov. 22, 6:30 PM to 8:30 PM<br>
    <strong>Where:</strong> Google Campus, London</p>
    <p><br><small><a href="https://www.google.com/maps?t=m&amp;q=EC2A+4BX&amp;ie=UTF8&amp;hq=&amp;hnear=London+EC2A+4BX,+United+Kingdom&amp;z=13&amp;ll=51.522604,-0.085506&amp;source=embed" rel="nofollow external" class="bo">View Larger Map</a></small></p>
    <p><a href="http://www.meetup.com/Untangling-the-Web-London/" rel="nofollow external" class="bo">Untangle the Web</a> is back at the Google Campus in London this month with three fantastic talks and a new bigger ground floor space!</p>
    <p>If you’re new to our Meetups, we host monthly events where we invite industry professionals from the world of the web to share their experiences and offer guidance to those new to the arena. With a philosophy of simplicity and conciseness, all talks are refreshingly “data-light” and cover a wide variety of topics.</p>
    <p>This month focuses on how to engage users and cultivate relationships with client. <a href="https://twitter.com/joffley" rel="nofollow external" class="bo">James Offer</a> will be talking about content strategy, and <a href="https://twitter.com/rufusboo" rel="nofollow external" class="bo">Ruth Smith</a> and Treehouse student <a href="http://teamtreehouse.com/bigg" rel="nofollow external" class="bo">Graham Davidson</a> will be discussing working with clients.</p>
    <p>As always there will be pizza, beer and soft drinks available at the end of the evening for everyone, so feel free to stick around and hang out after the talks. We’ll also have another Treehouse giveaway, so be sure to come and enter for a chance to win some fun Treehouse swag!</p>
    <p><a href="http://www.meetup.com/Untangling-the-Web-London/events/148238282/" rel="nofollow external" class="bo"><strong>RSVP</strong> to reserve your spot today</a> and please help us spread the word as we’ll have an even bigger space than usual, so the more the merrier. <img src="http://blog.teamtreehouse.com/wp-includes/images/smilies/icon_smile.gif" alt=":)" style="max-width: 100%; height: auto;"> </p>
    <p>We look forward to seeing you on the 22nd!</p>
    <p>The post <a href="http://blog.teamtreehouse.com/join-us-for-the-november-untangle-the-web-treehouse-meetup-in-london" rel="nofollow external" class="bo">Join Us for the November Untangle the Web + Treehouse Meetup in London</a> appeared first on <a href="http://blog.teamtreehouse.com" rel="nofollow external" class="bo">Treehouse Blog</a>.</p>
    </div>
]]>
</Body>
<Summary>When: Friday, Nov. 22, 6:30 PM to 8:30 PM  Where: Google Campus, London    View Larger Map   Untangle the Web is back at the Google Campus in London this month with three fantastic talks and a new...</Summary>
<Website>http://feedproxy.google.com/~r/teamtreehouse/~3/7IcAiKtUgIc/join-us-for-the-november-untangle-the-web-treehouse-meetup-in-london</Website>
<TrackingUrl>https://my3.my.umbc.edu/api/v0/pixel/news/38220/guest@my.umbc.edu/db376e77f3bc25a6ea5a85a723cd53b4/api/pixel</TrackingUrl>
<Tag>android</Tag>
<Tag>css</Tag>
<Tag>design</Tag>
<Tag>development</Tag>
<Tag>html</Tag>
<Tag>ios</Tag>
<Tag>javascript</Tag>
<Tag>responsive</Tag>
<Tag>treehouse</Tag>
<Tag>web</Tag>
<Group token="retired-583">Web Developer - Build Group</Group>
<GroupUrl>https://my3.my.umbc.edu/groups/retired-583</GroupUrl>
<AvatarUrl>https://assets3-my.umbc.edu/system/shared/avatars/groups/000/000/583/fc60f5d7abc2e080599bb6dc465db54d/xsmall.png?1363101197</AvatarUrl>
<AvatarUrl size="original">https://assets4-my.umbc.edu/system/shared/avatars/groups/000/000/583/fc60f5d7abc2e080599bb6dc465db54d/original.jpg?1363101197</AvatarUrl>
<AvatarUrl size="xxlarge">https://assets4-my.umbc.edu/system/shared/avatars/groups/000/000/583/fc60f5d7abc2e080599bb6dc465db54d/xxlarge.png?1363101197</AvatarUrl>
<AvatarUrl size="xlarge">https://assets4-my.umbc.edu/system/shared/avatars/groups/000/000/583/fc60f5d7abc2e080599bb6dc465db54d/xlarge.png?1363101197</AvatarUrl>
<AvatarUrl size="large">https://assets3-my.umbc.edu/system/shared/avatars/groups/000/000/583/fc60f5d7abc2e080599bb6dc465db54d/large.png?1363101197</AvatarUrl>
<AvatarUrl size="medium">https://assets3-my.umbc.edu/system/shared/avatars/groups/000/000/583/fc60f5d7abc2e080599bb6dc465db54d/medium.png?1363101197</AvatarUrl>
<AvatarUrl size="small">https://assets4-my.umbc.edu/system/shared/avatars/groups/000/000/583/fc60f5d7abc2e080599bb6dc465db54d/small.png?1363101197</AvatarUrl>
<AvatarUrl size="xsmall">https://assets3-my.umbc.edu/system/shared/avatars/groups/000/000/583/fc60f5d7abc2e080599bb6dc465db54d/xsmall.png?1363101197</AvatarUrl>
<AvatarUrl size="xxsmall">https://assets4-my.umbc.edu/system/shared/avatars/groups/000/000/583/fc60f5d7abc2e080599bb6dc465db54d/xxsmall.png?1363101197</AvatarUrl>
<Sponsor>Web Developer - Build Group</Sponsor>
<PawCount>0</PawCount>
<CommentCount>0</CommentCount>
<CommentsAllowed>true</CommentsAllowed>
<PostedAt>Mon, 11 Nov 2013 12:00:43 -0500</PostedAt>
<EditAt>Mon, 11 Nov 2013 12:00:43 -0500</EditAt>
</NewsItem>

</News>